magicolor 330 - Base Engine Service Manual 9-161
Removal and Replacement Procedures
RRP 9.78 IBT Belt Assembly (PL8.2.2)
Removal
1. Remove the Transfer Assembly (RRP 9.71).
The IBT is easily scratched. When removing the Transfer Assembly be extremely careful
that you do not touch the surface of the IBT with your fingers or scrape the IBT against
other components.
2. Place the Transfer Assembly on a clean, flat, and stable work surface.
3. Rotate the cams that are located on both sides of the Transfer Assembly and raise the Push In Shaft
off of the IBT Belt.
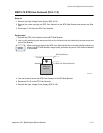
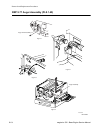
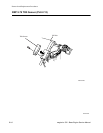
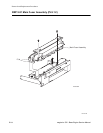
4. Remove the Push In Shaft from the Shaft arms (Figure 1).
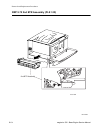
5. Push down on the front of the Middle Drive Roll until the screw hole on the Roll arm (inside the Trans-
fer Assembly) lines up with the screw hole on the front of the Transfer Assembly (Figure 2).
6. Insert a long screw or allen wrench through the two holes to lock the front of the Middle Drive Roll in
place.
7. Push down on the rear of the Middle Roll until the screw hole on the Roll arm (inside the Transfer
Assembly) lines up with the screw hole on the rear of the Transfer Assembly.
8. Insert a long screw or allen wrench through the two holes to lock the rear of the Middle Drive Roll in
place.
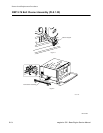
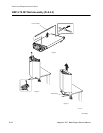
9. Place the Transfer Assembly on edge, with the TR0 Sensor at the bottom.
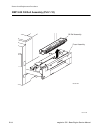
10. Hold on to the edge of the Belt and rotate the Belt as you slowly pull it off of the Assembly (Figure 3).
Replacement
1. Position the IBT Belt Assembly so that when the Belt is reinstalled onto the Transfer Assembly, the two
edge marks are on the same side as the TR0 Sensor.
2. Carefully rotate and slide the Belt onto the Transfer Assembly.
3. Continue sliding the Belt onto the Transfer Assembly until the edge marks are under the TR0 Sensor.
4. Remove the two long screws or allen wrenches that are locking the Middle Drive Roll in place.
5. Raise the Shaft arms above the Belt and reinstall the Push In Shaft into the ends of the Shaft arms.
6. Reinstall the Transfer Assembly (RRP 9.71).


