magicolor 330 - Base Engine Service Manual 9-99
Removal and Replacement Procedures
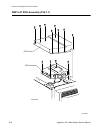
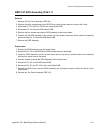
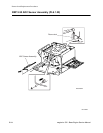
RRP 9.47 ROS Assembly (PL6.1.1)
Removal
1. Remove the Top Cover Assembly (RRP 9.3).
2. Remove the eight screws securing the ROS Cover to the printer frame and remove the Cover.
3. Disconnect P/J 121 and P/J 122 from the Laser Diode PWB.
4. Disconnect P/J 124 from the SOS Sensor PWB.
5. Remove the four screws securing the ROS Assembly to the printer frame.
6. Carefully lift the ROS Assembly a few inches off of the printer frame and reach under the Assembly
and disconnect P/J 123 from the ROS Motor PWB.
7. Remove the ROS Assembly.
Replacement
1. Position the ROS Assembly over the printer frame.
2. Reconnect P/J 123 to the ROS Motor PWB located under the Assembly.
3. Lower the ROS Assembly onto the printer frame and line up the four screws holes in the Assembly
with the four screw holes in the frame.
4. Use four screws to secure the ROS Assembly to the printer frame.
5. Reconnect P/J 124 to the SOS Sensor PWB.
6. Reconnect P/J 121 and P/J 122 to the Laser Diode PWB.
7. Reinstall the ROS Cover over the ROS Assembly and use eight screws to secure the Cover to the
printer frame.
8. Reinstall the Top Cover Assembly (RRP 9.3).


