


INSTALLATION-STATION APPARATUS
SECTION 100-816-206
MARCH 1993
R-UP (651 O-H,
651 O-S, 6520-S)
ROOM NOISE
\ \
TO HHEU
CONNECTOR
\ AbP1
II-UP
‘-520~SD) ;;;;z;TOR ;IRE
CARBON STRAPS
w201
w202
HHEU STRAP
W203
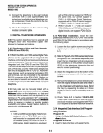
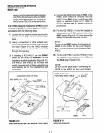
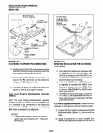
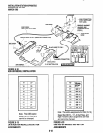
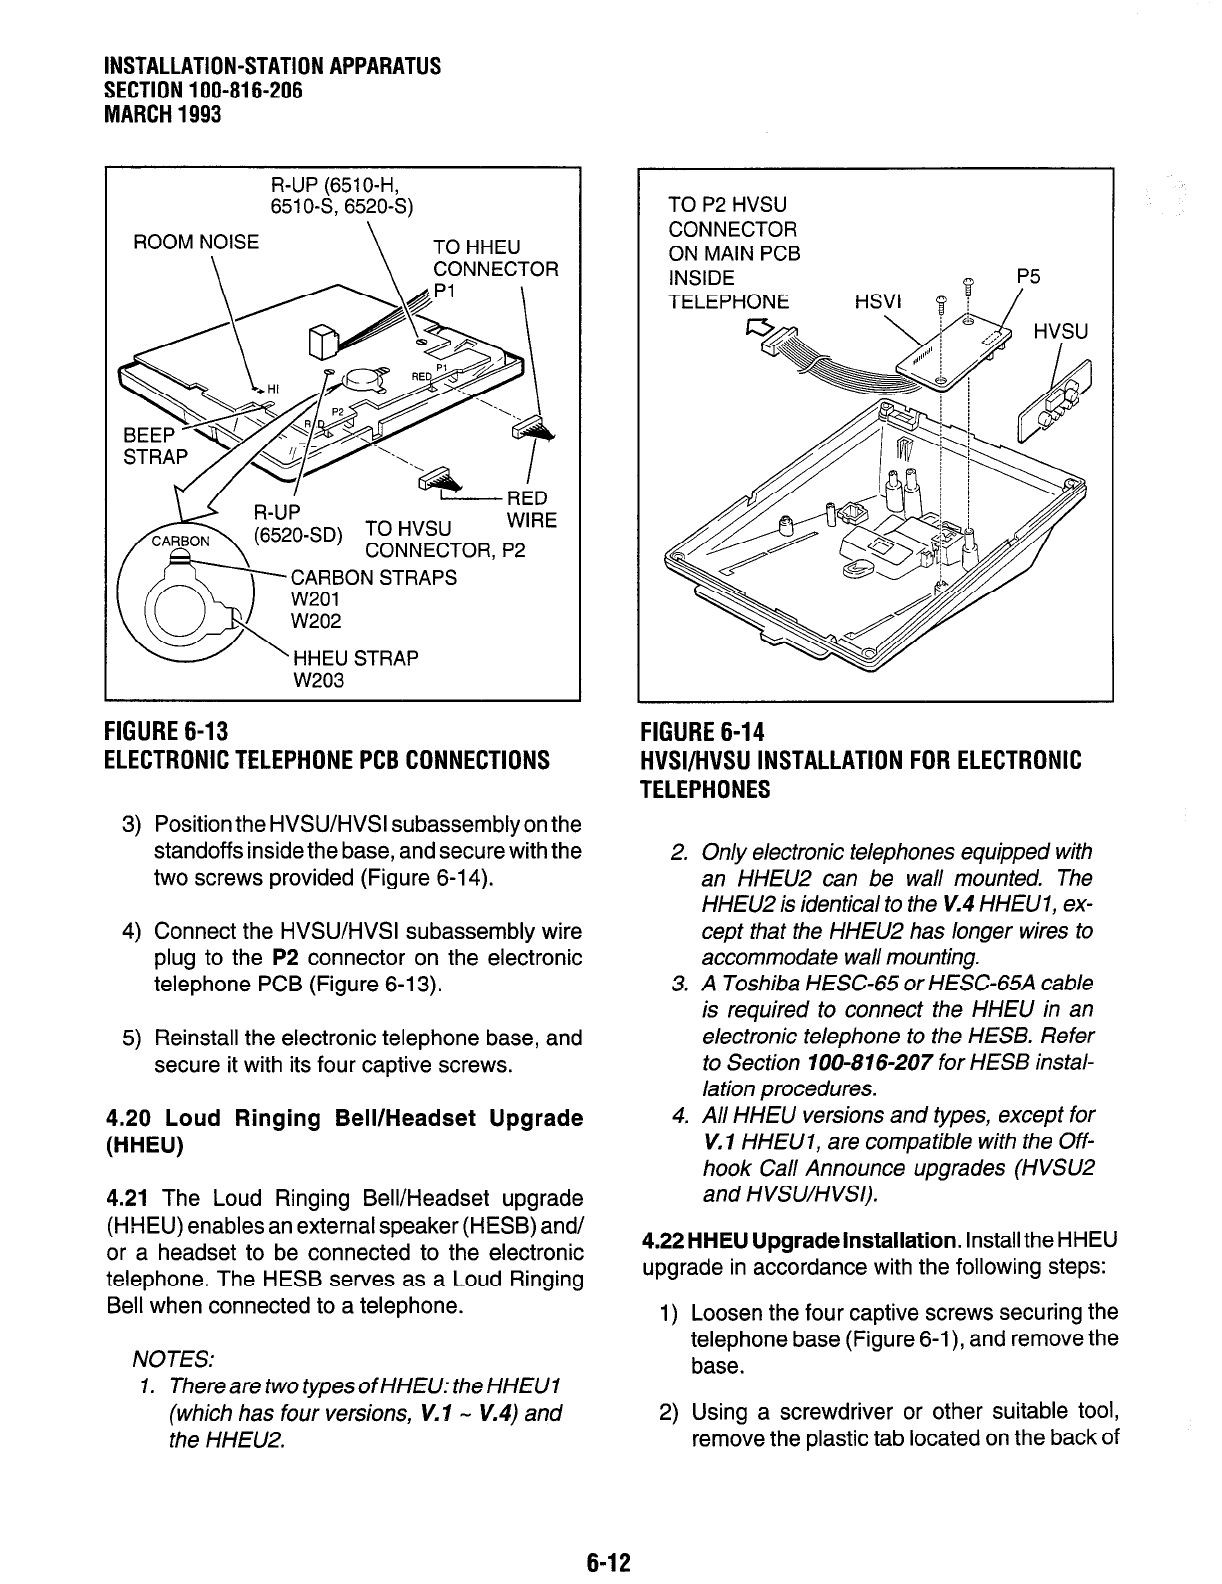
FIGURE 6-13
ELECTRONIC TELEPHONE PCB CONNECTIONS
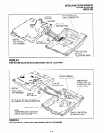
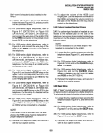
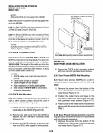
3) Position the HVSWHVSI subassembly on the
standoffs inside the base, and secure with the
two screws provided (Figure 6-14).
4) Connect the HVSWHVSI subassembly wire
plug to the P2 connector on the electronic
telephone PCB (Figure 6-l 3).
5) Reinstall the electronic telephone base, and
secure it with its four captive screws.
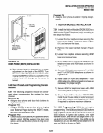
4.20 Loud Ringing Bell/Headset Upgrade
(HHEU)
4.21
The Loud Ringing Bell/Headset upgrade
(HHEU) enables an external speaker (HESB) and/
or a headset to be connected to the electronic
telephone. The HESB serves as a Loud Ringing
Bell when connected to a telephone.
NOTES:
1. There are two types of HHEU: the HHEUl
(which has four versions, V. I - V.4) and
the HHEUZ.
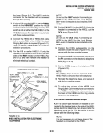
TO P2 HVSU
CONNECTOR
ON MAIN PCB
INSIDE
TELEPHONE HSVI Q
FIGURE 6-14
HVSI/HVSU INSTALLATION FOR ELECTRONIC
TELEPHONES
2. Only electronic telephones equipped with
an HHElJ2 can be wall mounted. The
HHEUZ is identical to the V.4 HHEUl, ex-
cept that the HHElJ2 has longer wires to
accommodate wall mounting.
3. A Toshiba HEX-65 or HESC-65A cable
is required to connect the HHEU in an
electronic telephone to the HESB. Refer
to Section 100-816-207 for HESB instal-
la tion procedures.
4. All HHEU versions and types, except for
V. 1 HHEW, are compatible with the Off-
hook Call Announce upgrades (HVSUZ
and HVSWHVSI).
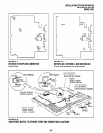
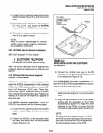
4.22 HHEU Upgrade Installation.
Install the HHEU
upgrade in accordance with the following steps:
1) Loosen the four captive screws securing the
telephone base (Figure 6-l), and remove the
base.
2) Using a screwdriver or other suitable tool,
remove the plastic tab located on the back of
6-12