PROGRAMMiNGPROCEDURES-INTRODUCTION
SECTION lOO-816-301
MARCH1993
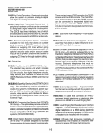
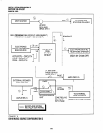
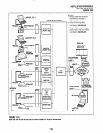
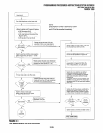
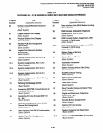
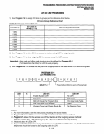
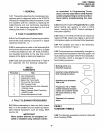
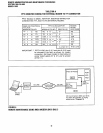
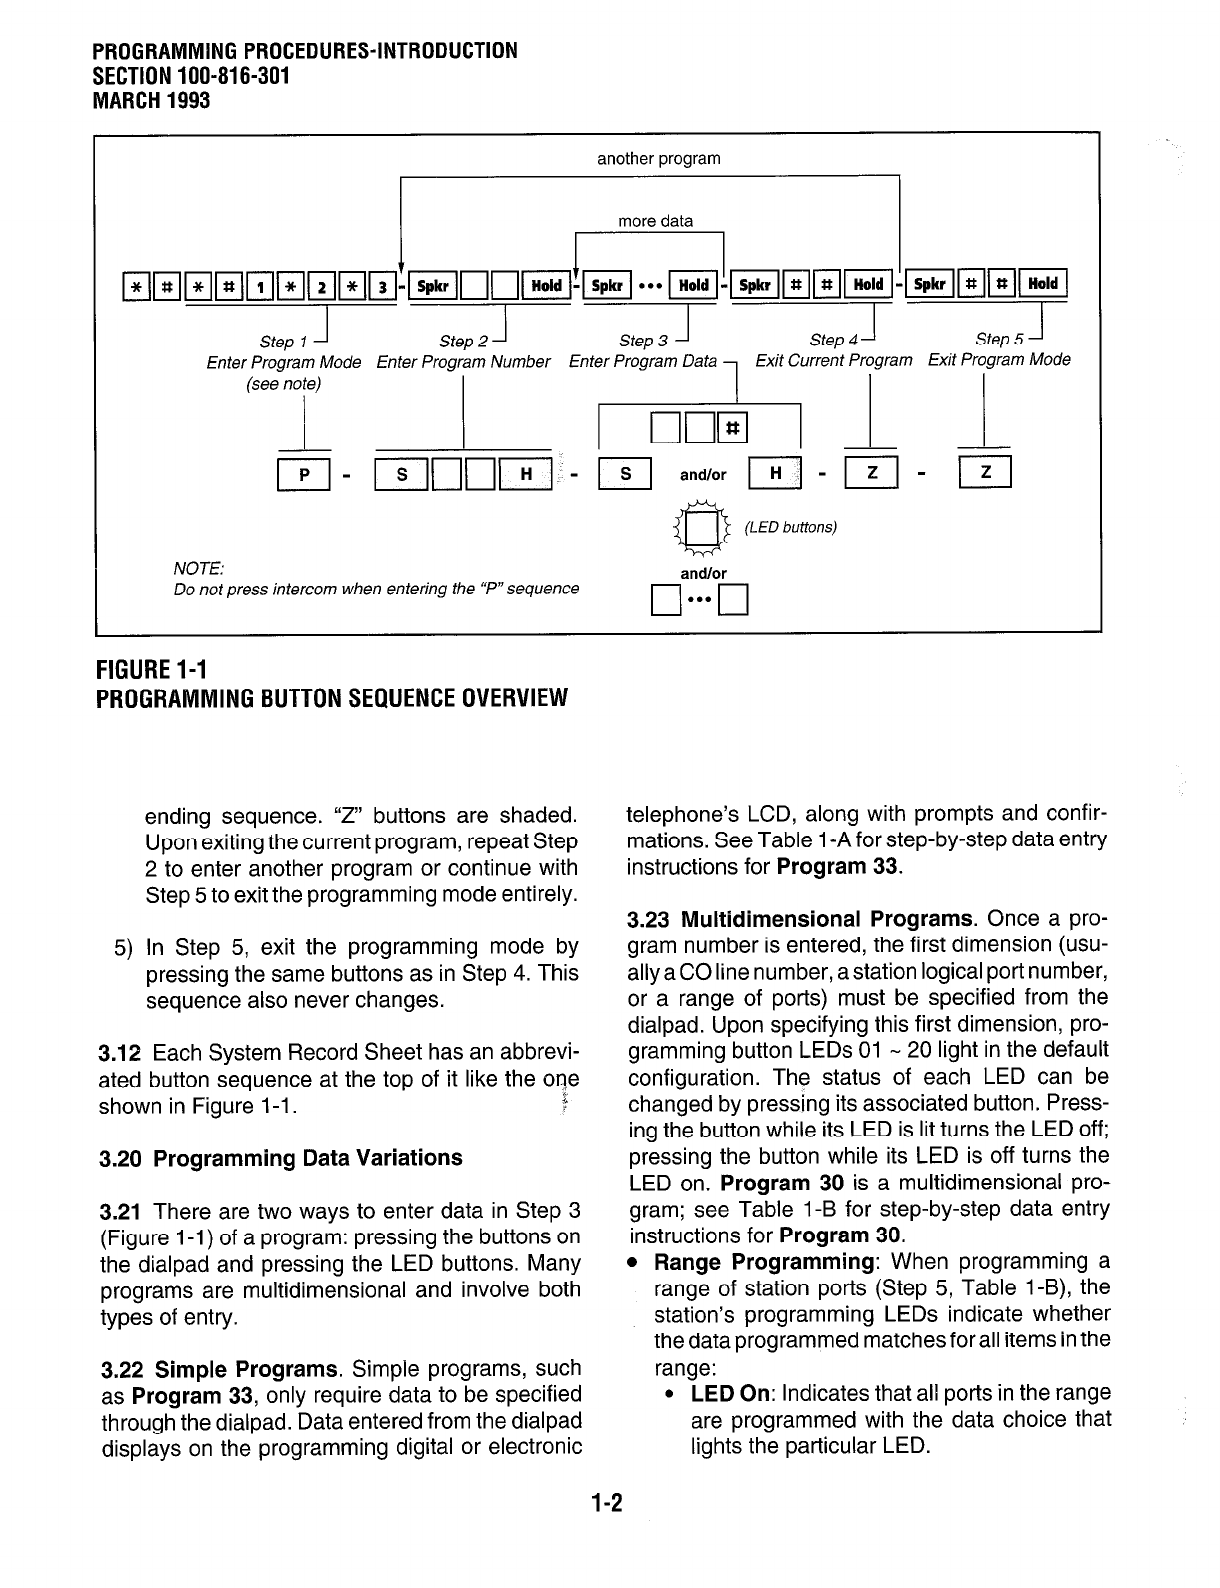
another program
more data
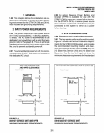
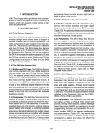
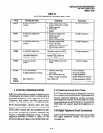
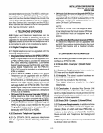
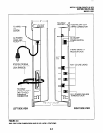
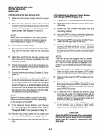
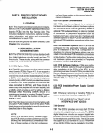
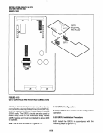
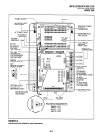
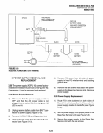
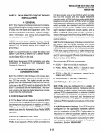
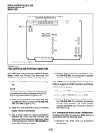
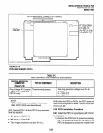
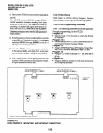
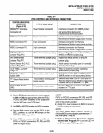
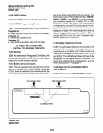
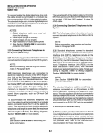
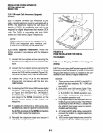
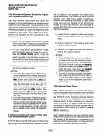
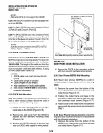
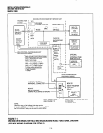
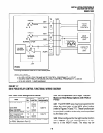
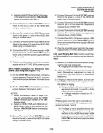
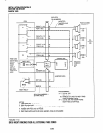
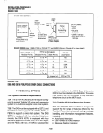
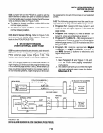
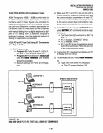
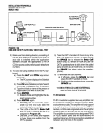
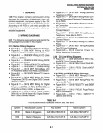
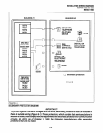
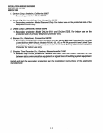
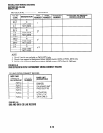
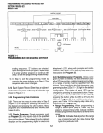
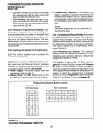
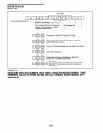
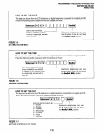
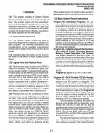
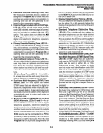
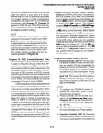
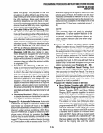
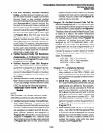
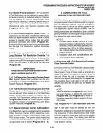
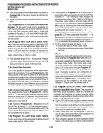
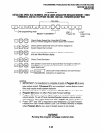
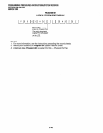
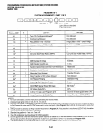
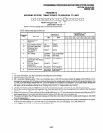
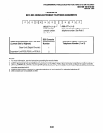
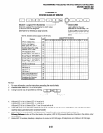
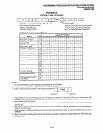
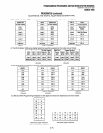
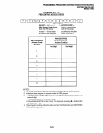
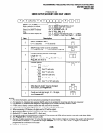
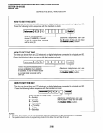
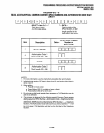
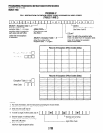
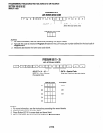
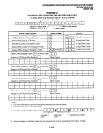
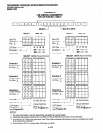
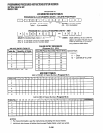
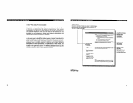
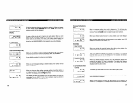
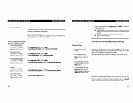
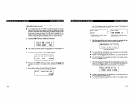
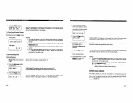
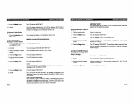
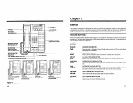
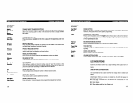
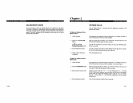
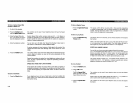
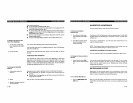
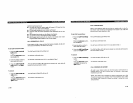
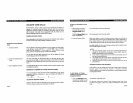
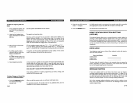
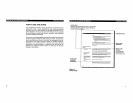
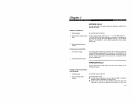
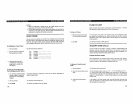
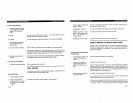
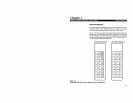
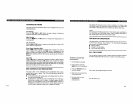
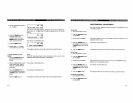
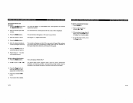
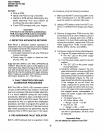
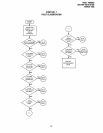
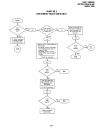
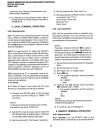
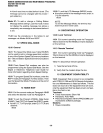
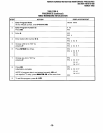
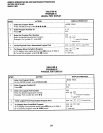
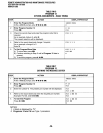
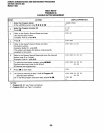
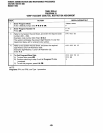
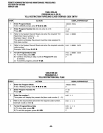
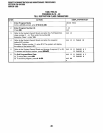
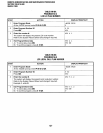
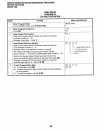
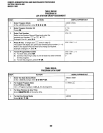
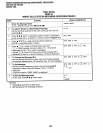
Step 1
1
Step 2 J
Enter Program Mode
Enter Program Number Exit Program Mode
(see note)
NOTE:
Do not press intercom when entering the “P” sequence
and/or
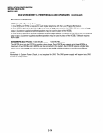
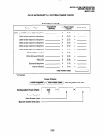
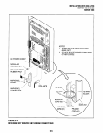
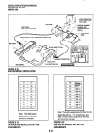
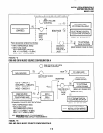
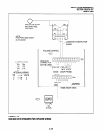
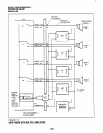
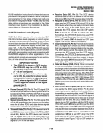
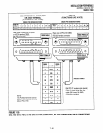
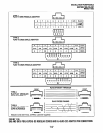
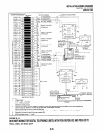
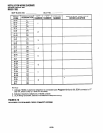
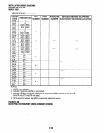
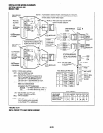
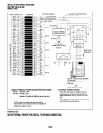
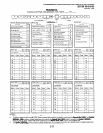
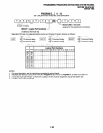
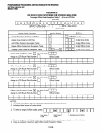
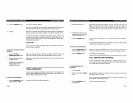
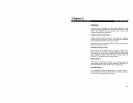
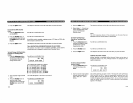
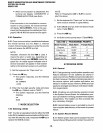
FIGURE l-l
PROGRAMMING BUTTON SEQUENCE OVERVIEW
ending sequence. ‘7” buttons are shaded.
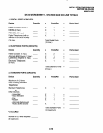
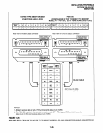
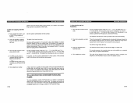
Upon exiting the current program, repeat Step
2 to enter another program or continue with
Step 5 to exit the programming mode entirely.
5) In Step 5, exit the programming mode by
pressing the same buttons as in Step 4. This
sequence also never changes.
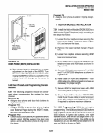
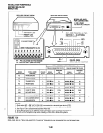
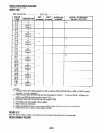
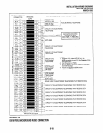
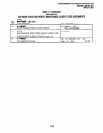
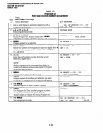
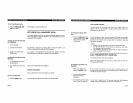
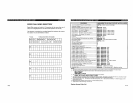
3.12 Each System Record Sheet has an abbrevi-
ated button sequence at the top of it like the one
shown in Figure l-1.
c
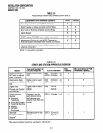
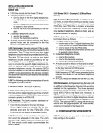
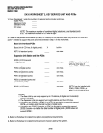
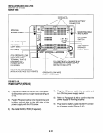
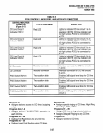
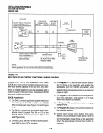
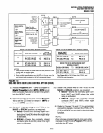
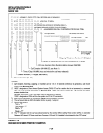
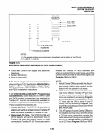
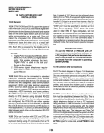
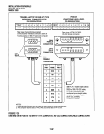
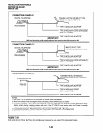
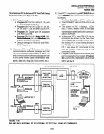
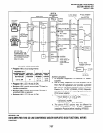
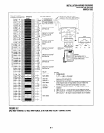
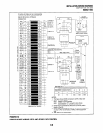
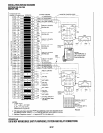
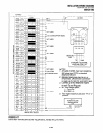
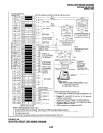
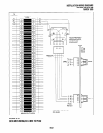
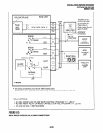
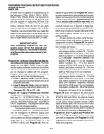
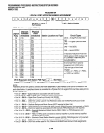
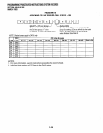
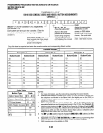
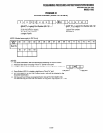
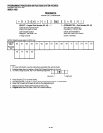
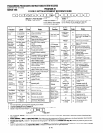
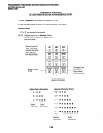
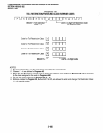
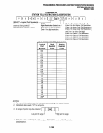
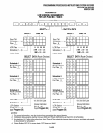
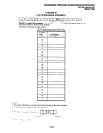
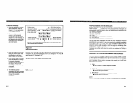
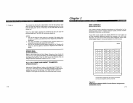
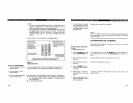
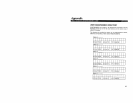
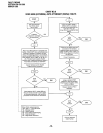
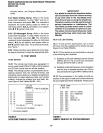
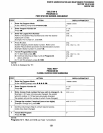
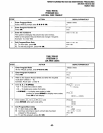
3.20 Programming Data Variations
3.21 There are two ways to enter data in Step 3
(Figure 1-l) of a program: pressing the buttons on
the dialpad and pressing the LED buttons. Many
programs are multidimensional and involve both
types of entry.
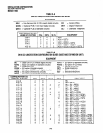
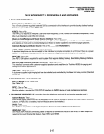
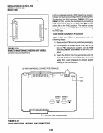
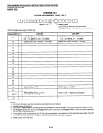
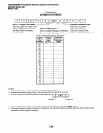
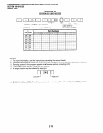
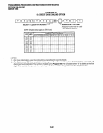
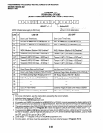
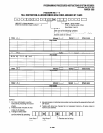
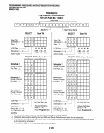
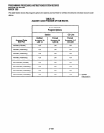
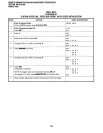
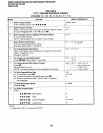
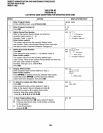
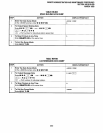
3.22 Simple Programs. Simple programs, such
as Program 33, only require data to be specified
through the dialpad. Data entered from the dialpad
displays on the programming digital or electronic
telephone’s LCD, along with prompts and confir-
mations. See Table 1 -A for step-by-step data entry
instructions for Program 33.
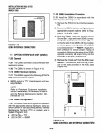
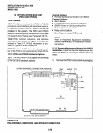
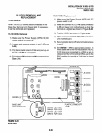
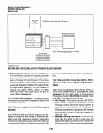
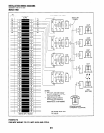
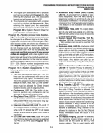
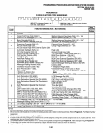
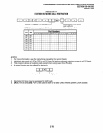
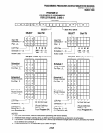
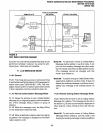
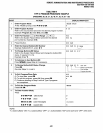
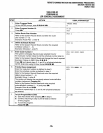
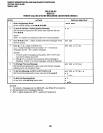
3.23 Multidimensional Programs. Once a pro-
gram number is entered, the first dimension (usu-
ally a CO line number, a station logical port number,
or a range of ports) must be specified from the
dialpad. Upon specifying this first dimension, pro-
gramming button LEDs 01 - 20 light in the default
configuration. The status of each LED can be
changed by pressing its associated button. Press-
ing the button while its LED is lit turns the LED off;
pressing the button while its LED is off turns the
LED on. Program 30 is a multidimensional pro-
gram; see Table 1-B for step-by-step data entry
instructions for Program 30.
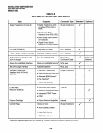
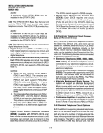
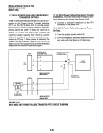
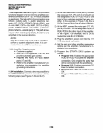
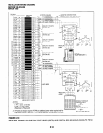
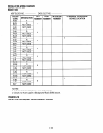
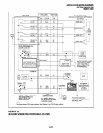
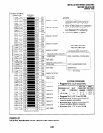
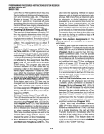
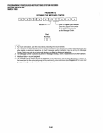
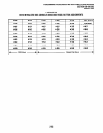
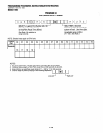
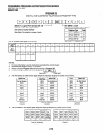
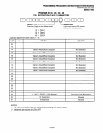
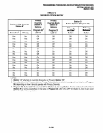
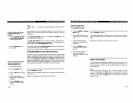
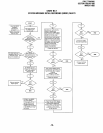
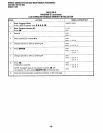
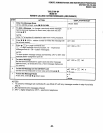
l
Range Programming: When programming a
range of station ports (Step 5, Table l-B), the
station’s programming LEDs indicate whether
the data programmed matches for all items in the
range:
l
LED On: Indicates that all ports in the range
are programmed with the data choice that
lights the particular LED.
1-2