INSTALLATION-OK 16 KSU & PCB
SECTION 100-816-205
MARCH 1993
2)
potentially hazardous- ring voltage. Do not
remove this shield.
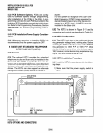
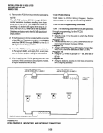
Ensure that the PSTU subunit (SSTU) is se-
curely attached to the PSTU (refer to Figure 5
15).
NOTE:
WI, the ring generator level option, should be
set in the H position (factory) for initial instal-
la tion.
3) Insert the PSTU into the appropriate slot (refer
to Paragraph 5.22), and apply firm, even
pressure to ensure proper mating of connec-
tors.
9.30 PSTU Wiring
9.31 Refer to PSTU Wiring Diagram, Section IOO-
816-208, for wiring/interconnecting details.
9.32 The PSTU is registered for use with OL13A
type lines for off-premises stations.
9.40 PSTU Programming Overview
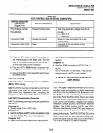
9.41 The following parameters may be specified,
through programming, for the PSTU:
Program 03
l
Specify code 31 for all slots that have PSTUs
installed.
Program 31
l
Used to configure all PSTU ports connected to
voice mail (Section 100-816-207 for more de-
tails).
Program 1 O-2
l
Used to set standard telephone ringing option.
l
Also used for BGM connection.
Program 19
l
Used for BGM connection also.
10 STANDARD/ELECTRONIC TELE-
PHONE INTERFACE UNIT (PESU)
10.00 General
10.01 The Standard/Electronic Telephone Inter-
face Unit (PESU) provides two standard telephone
interface circuits (1 and 2) identical to PSTU circuits
for connection between standard telephones, or
two-wire devices, and the system. It also provides
four electronic telephone interface circuits (5 - 8)
identical to PEKU circuits for connecting electronic
telephones, BGM or an external amplifier. The
PESU provides a ring generator for circuits 1 and 2
(with a ring voltage of either 19OV P-P or 130V P-
P), and it must be installed in the Expansion Unit.
l
The PESU does not support an HDSS console
connection.
l
The PESU provides connectors to mount the
EOCU for OCA to electronic telephones.
NOTE:
A KSU must be installed in the Base Unit for
the system to recognize Dual-Tone Multi-
Frequency (DTMF) tones sent from standard
telephones or other two-wire devices that are
connected to the PESU.
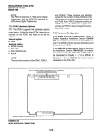
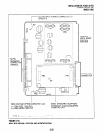
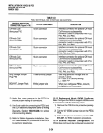
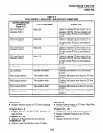
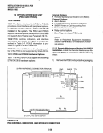
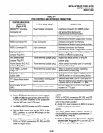
10.02 The PESU controls and interface connectors
are shown in Figure 5-16 and described in Table
5-D.
10.10 PESU Hardware Options
10.11 The PESU supports the following hardware
options:
l
Internal option: Off-hook Call Announce
(EOCU).
NOTE:
Refer to Section 1 OO-816-206and Section 1 OO-
816-207 for installation of external options.
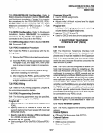
10.12 Off-hook Call Announce (EOCU) Installa-
tion. Install the Off-hook Call Announce in accor-
dance with the following steps:
1) Remove the PCB from its protective packaging.
NOTE:
PESU connectors PlO, P20, P40, P50, and
P60 are positioned to allow installation of the
EOCU only in the proper position (refer to
Figure 5- 16).
2) Mate the EOCU connectors Jl 0,520, J40, J50,
and J60 with the PESU connectors PlO, P20,
P40, P50, and P60 (refer to Figure 5-16).
5-22


