


22
Recording Paper Size Adjustment
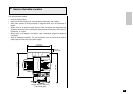
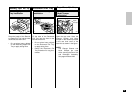
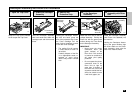
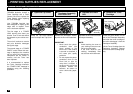
Pull the paper tray out and re-
move the recording paper.
Remove the Paper Guide.
Install the Paper Guide in the
correct position for the new pa-
per size.
Paper size indicators have been
conveniently molded into the pa-
per tray next to the paper post.
NOTE:
Install the Paper Guide se-
curely. If you fail, a PAPER
EMPTY error will be dis-
played even when the paper
is loaded in the paper tray.
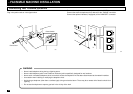
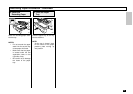
Place the recording paper into
the tray and push the tray into
the machine.
• Check to make sure that the
LCD display has returned to
the time and date standby
mode and no alarm lamps
are illuminated.
• Make a copy using the new
recording paper to confirm
proper operation.
• Be sure to load the recording
paper image side down.
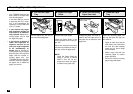
Change the paper size label lo-
cated in the front-right corner of
the paper tray to match the new
paper size.
About Paper Sizes:
• Your TOSHIBA facsimile has
been preset to accept letter
size recording paper.
In the event that you receive
a legal-size (8.5”x14”) recep-
tion, it will automatically be
reduced to fit onto letter-size
(8.5”x11”) paper.
• If you receive only Legal-
size receptions and do not
wish them to be automati-
cally reduced: Adjust the re-
cording paper tray to load
the legal size paper.
• If you receive a mixture of
Letter and Legal-size re-
ceptions, and you do not
wish your legal receptions
to be automatically re-
duced: Add an optional re-
cording paper tray to support
both the letter and legal-size
paper. With the second re-
cording paper tray, your
TOSHIBA facsimile will auto-
matically select the appropri-
ate paper size to match the
pages you receive.
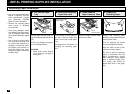
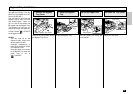
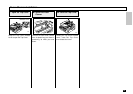
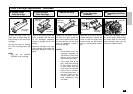
Pull Out the Paper
Tray
1
Adjust the Paper
Guide
2
Close the Paper
Tray
4
Attach the Recording
Paper Size Label
3
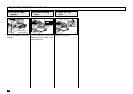
029 036
034
Recording Paper
Size Label
030