


30
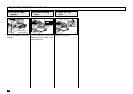
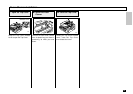
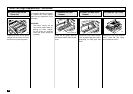
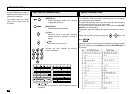
Grasp the two green tabs the
used fuser cleaner from the ma-
chine.
Remove the fuser
Cleaner
11
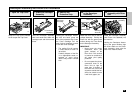
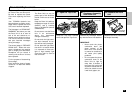
Install the New fuser
Cleaner
12
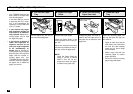
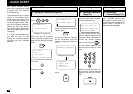
Toner Cartridge Replacement - continued
Fuser Cleaner
Replacing the Fuser Cleaner
To maintain optimum print quali-
ty, replace the Fuser Cleaner
each time you replace the Toner
Cartridge.
CAUTION:
The fuser’s interior can be
very hot. Be careful when re-
placing the fuser cleaner.
Do not touch any surfaces
inside the printer except as
indicated.
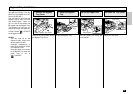
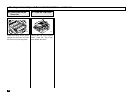
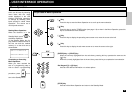
Press firmly down on the green
squares on the Drum Unit until
the Drum Unit clicks into place.
Press Down on the
Drum Unit
10
Fuser Cleaner
Drum Unit
044
047
061
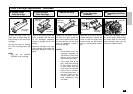
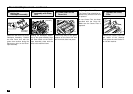
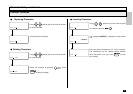
Holding the Top Cover Release
Lever, close the Top Cover,
then release the Lever.
Close the Top Cover
13
045
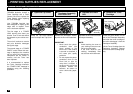
Remove the new Fuser Cleaner
from its plastic bag and install it
positioning its white pad side
down.