


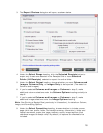

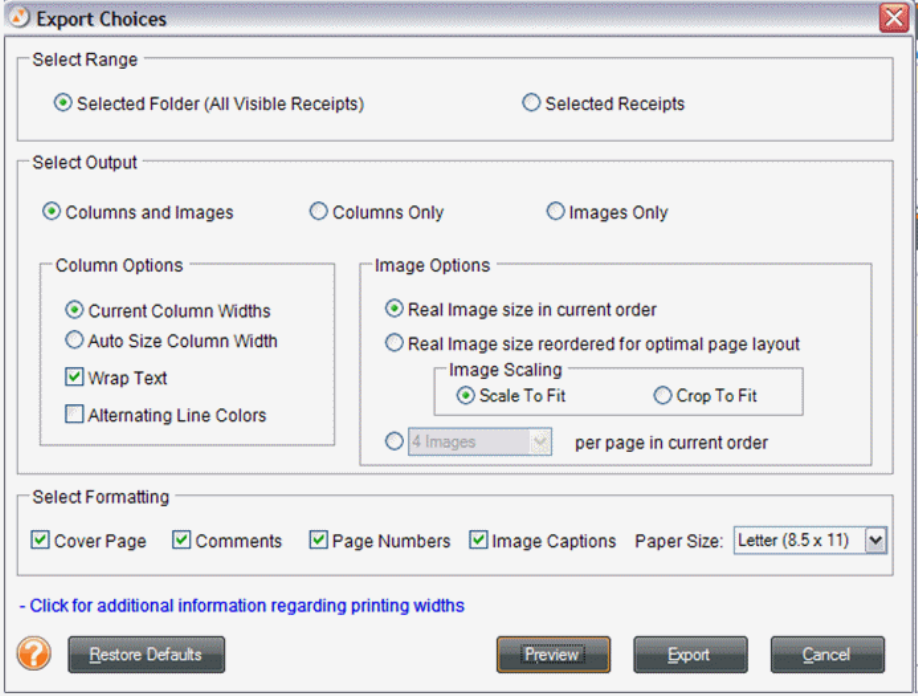
3. The Export Choices dialog box will open, as shown below.
4. Under the
Select Range heading, click the Selected Receipts button to
export only those rows selected in the Receipts Grid or leave
Selected
Folder (All Receipts)
selected to export the entire folder.
5. Under the
Select Output heading, choose whether you want Columns and
Images
, Columns Only, or Images Only to be exported. (The default is
Columns and Images.)
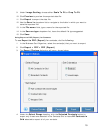
6. If you've selected
Columns and Images or Columns in step 5, make
additional column selections under the
Column Options heading and skip to
step 8.
7. If you've selected
Columns and Images or Columns in step 5, make
additional image selections under the
Image Options heading.
Note: See Printing a Receipt Row (previously in this section), for details on Column,
Image, and Formatting Options.
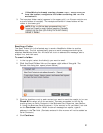
8. Under the
Select Formatting heading, choose whether to include a cover
page (with user profile, folder, and receipt summary information), folder and
receipt comments, paper size, page numbers, and/or image captions (that
reference images to receipt rows). By default, all options are checked to be
included.
18