


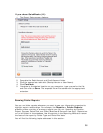


3. Place a receipt in the scanner and scan
4.
Verify data and add a vendor name
5.
Adjust your image
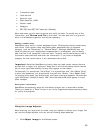
Create or Select a Folder
After scanning a receipt (see Using the Quick Scan Center), you need to select the
"container" into which your receipts will be scanned, stored, and organized. In
NeatWorks, all receipts are filed into Folders.
A Folder is simply an electronic version of a physical filing cabinet. You can create
and use folders to track a variety of expenses. For example, you might create
separate folders to track expenses for a business trip, office supplies, a family
vacation, and a home improvement project. You can manage your groceries, school
supplies, or medical expenses using separate folders.
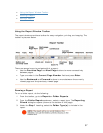
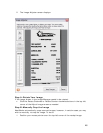
To Create a New Folder:
You can create a new folder by performing these steps:
1. If you are in the Inbox, click
New.
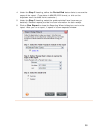
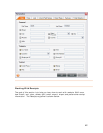
2. On the Create New Folder screen that displays, enter the Folder Name, Type,
and Label.
3. Click
Save.
Or, if you are in the Receipts organizer, you can click
New > Folder on the
toolbar.
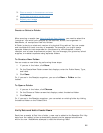
To Open a Folder:
1. If you are in the Inbox, click Choose.
2. On the Choose a Folder screen that displays, select the desired folder.
3. Click
Select.
Or, if you are in the Receipts organizer, you can select an existing folder by clicking
the desired folder on the Folders Grid.
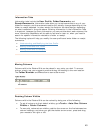
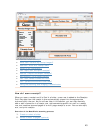
Verify Data and Add a Vendor Name
Each time a receipt is filed into a folder, a new row is added to the Receipts Grid. Key
data from the receipt is then automatically placed into the appropriate columns
within the row.
NeatWorks attempts to read the following fields:
44