


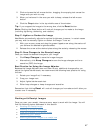

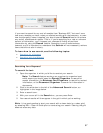
5. On the Confirm File Export screen, type a file name in the Provide a File Name
dialog box or confirm or edit the file name already in the field (if applicable)
and choose whether to compress the file.
6. Click
Continue. Your default email program will launch and a new message
opens. The To field of the new message will be populated with the contacts
selected in the previous step; if you did not choose any Quick contacts, then
type an email address. The selected folder(s) will automatically be attached to
the message.
7. Complete the email message and click
Send.
For more information, see
Emailing a Folder.
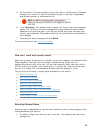
How can I work with receipt rows?
Each time a receipt is scanned into a folder, a new row is added to the Receipts Grid.
Where possible, key data from the receipt is automatically placed into the
appropriate columns within the row. You can also manually add a new row (with or
without scanning a receipt), edit information in a receipt row, add comments about
any cell in a receipt row, and associate multiple scanned receipts to a row.
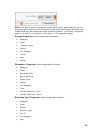
You will find the following, related topics addressed in this section:
•
Select a receipt row
•
Edit receipt row cells
•
Add comments to receipts
•
Adding a new receipt row
•
Move a receipt row to another folder
•
Move a receipt row to the Document Organizer
•
Delete a receipt row
•
View receipts together from multiple folders
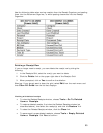
Selecting Receipt Rows
Selecting rows in NeatWorks is very similar to selecting rows in other programs that
use spreadsheet-type layouts:
• To select a single row, click any cell in the row. The selected row has a blue
background.
52