


• To select multiple adjacent rows, click in the first row you want to select, then
hold down the Shift key and click in the last row you want to select.
• To select multiple non-adjacent rows, click in the first row you want to select,
then hold down the Ctrl key and click in each row you want to select.
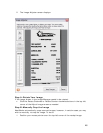
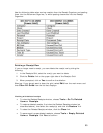
Editing Receipt Row Cells
Anytime you need to modify information in a receipt row, you can do so by editing
your receipt row cells as follows:
1. In the Receipts Grid, click the cell you want to modify.
2. Edit the receipt's expense information as needed, keeping in mind the
following:
• To add a vendor name, simply click a receipt's Vendor cell and type the
name. The vendor name will automatically be added to the vendor name
database and recognized the next time you scan a receipt with that
name.
• Information in the Receipt Row Number, Date Created, Last Modified,
Attached and Split ID columns is generated automatically and cannot be
edited.
• To modify the contents of a cell using a dropdown menu, click on the
down arrow on the right side of the selected cell and choose an entry
from the list, a date from the calendar, or use the calculator that
displays.
• To modify the contents of a cell manually, click in the cell and start
typing. The first time you type a new entry into a cell, it will
automatically be added to the dropdown list for that column, so you will
never have to type it again!
NeatWorks saves every receipt you scan as well as any text added automatically
during the scan or entered manually by you.
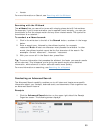
Adding Comments to Receipts
Adding comments to your receipts is important, because the more information you
can provide about each expense, the more information NeatWorks will be able to
retrieve later on, when you need to search for a specific expense in one of your
folders. Any details you record about a specific receipt are then stored in the folder
with the receipt information.
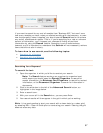
To add comments to receipts:
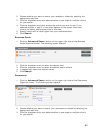
1. In the Receipts Grid, click in the cell where you want to add information. In the
Additional Field info area, the name of the selected cell appears in the heading.
53