


Exporting QIF Files to Quicken 2004 (and Earlier)
If you work with Quicken and want to export your information to there, as QIF
file(s), just do the following:
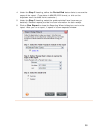
1. Select the receipt(s) or folder(s) you want to export.
2.
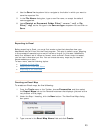
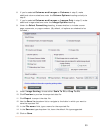
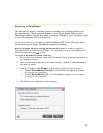
From the toolbar, Choose Export > QIF (Quicken).
3.
Do one of the following:
•
To export all of the receipts in the selected folder, click the Selected
Folder (All Receipts)
radio button.
•
To export only the receipts that are currently selected, click the
Selected Receipts radio button.
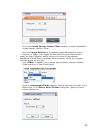
4.
Click Continue.
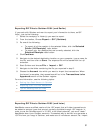
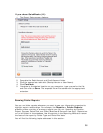
5.
Navigate to the desired destination location on your computer, type a name for
the file, and then click on
Save. The exported file will be saved with the .qif
extension.
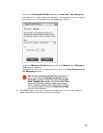
6.
Start Quicken and choose File > Import > QIF.
7.
Navigate to the folder containing the file you exported in step 5.
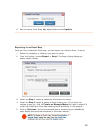
8.
Choose the Account into which you want to import the transactions. When
the import is complete, the transactions will be in the
Transactions to be
Approved
section of the Quicken register.
For more information, see the following topics:
•
Setting Up a Cash Account in Quicken
•
Exporting a QIF File from NeatWorks
•
Tips for Working with QIF Files
Exporting QIF Files to Quicken 2005 (and Later)
NeatWorks uses a modified version of the .QIF export that will allow transactions to
be added to account types that are not normally available through .QIF imports. In
order to use the Quicken export in 3.0 SP1 to its fullest potential, you must "teach"
NeatWorks about your Quicken accounts. The easiest way to do that is to generate a
.QIF file from your copy of Quicken, and make sure it includes an account list. Import
31