


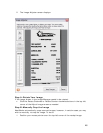

1. In the Receipts Grid, select the receipt you want to zoom in or out on.
2. In the
Receipt Image area, click the zoom in/zoom out icons.
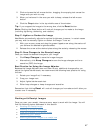
Viewing a Receipt in Full Screen Mode
If you want to see a much larger view of your receipt image, you can view the image
in full screen mode. To do so:
1. Click the icon on the upper right side of the Receipts Image area.
2. A full screen image of the receipt displays. You can change your view by
clicking the appropriate icon(s).
3. Click the
X icon (top right corner) to return to normal view.
Changing the Order of Multiple Scanned Images
If you have multiple images scanned into a single document row, you can change the
order in which they appear (and are numbered) by clicking the Reorder (
) icon
on the bottom of the Document Image area of the Organizer.
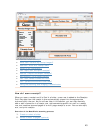
Importing an Image as a New Receipt
If you already have an image stored on your computer and would like to add it to a
receipts folder, you can do the following:
1. In the folders grid, click on the folder into which you want to import a receipt.
2. From the Toolbar, choose
Import > Import as New Receipt.
3. Navigate to the folder on your computer that contains the image and select it.
4. Click
Open.
Importing Additional Images into a Receipt Row
49