


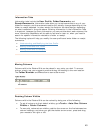
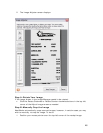

2. Click and press the left mouse button, dragging the cropping tool across the
image area you wish to crop.
3. When you’ve boxed in the area you wish to keep, release the left mouse
button.
4. Click the
Crop button in the top middle area of the window.
Tip: If you cropped the image to the wrong size, click the Reset button.
Note: Clicking the Reset button will undo all changes you’ve made to the image
(including lightening, darkening, and rotation).
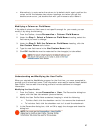
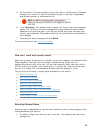
Step C: Lighten or Darken the Image
NeatWorks automatically adjusts for optimal brightness; however, in certain cases
you may wish to manually lighten or darken the image. To do so:
1. With your mouse, press and drag the green-tipped arrow along the scale until
you achieve the desired brightness effect.
2. Release the arrow at the desired place along the scale by releasing the mouse.
Step D: Save Changes to the Receipt Image
Once you made the desired changes to your image:
• Click
Keep Changes to save the image changes.
• Alternatively, click
Keep Changes to save the image changes and to re-
scanalize (OCR) the image.
Best Practice for Using the Image Adjuster
Because the Image Adjuster does not allow for any additional changes after you
adjust the lighter/darker scale, we recommend the following best practice for using
the tool:
1. Rotate your image first, if necessary.
2. Crop your image next.
3. Adjust lighter/darker scale last.
4. Either keep changes or keep changes and scanalize.
Remember that clicking
Reset will undo all changes you've made and will allow you
to start over if necessary.
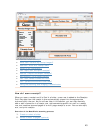
Working with Receipt Images
Once you scan your receipt, there are many ways to work with the image. You will
find the following topics addressed in this section:
• Rotating the receipt image
•
Zooming in or out of the image
•
View ing a receipt in full screen mode
•
Rescanning your receipt
•
Scanning additional images to a receipt row
47