


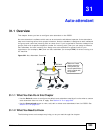

Chapter 31 Auto-attendant
ISG50 User’s Guide
507
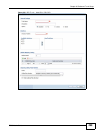
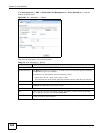
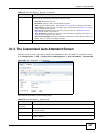
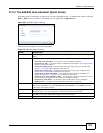
31.3 The Customized Auto-Attendant Screen
Use this screen to view, add, edit or delete auto-attendants from the ISG50. To access this screen,
click Configuration > PBX > Outbound Line Management > Auto-Attendant > Customized.
Figure 329 Auto-Attendant > Customized
Each field is described in the following table.
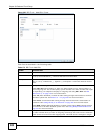
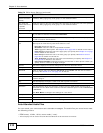
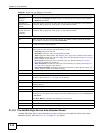
Action Type Select how the auto-attendant should proceed if no key is pressed for 5 seconds or the
caller inputs an incorrect key code three times in a row.
• Hang Up disconnects the call.
• Extension routes the call to the specified extension.
• ACD engages the ACD system. See Chapter 38 on page 553 for details on this feature.
• Page Group forwards the call to the page group you specify. See Chapter 37 on page
549 for details on this feature.
• Hunt Group forwards the call to the hunt group you specify. See Section 38.5 on
page 562 for details on this feature.
• Auto Attendant forwards the call to the auto attendant you specify. See Chapter 31
on page 503 for details on this feature.
• User Defined Number forwards the call to the extension or other phone number you
specify. Enter a number 3-20 digits in length.
Apply
Click this to save your changes.
Table 175 Auto-Attendant > Default (continued)
LABEL DESCRIPTION
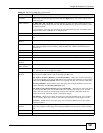
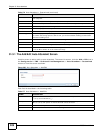
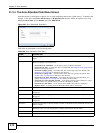
Table 176 Auto-Attendant > Customized
LABEL DESCRIPTION
Auto-Attendant
Summary
Use this section to manage your custom auto attendants.
Add Click this to create a new entry. Select an entry and click Add to create a new entry after
the selected entry.
Edit Double-click an entry or select it and click Edit to open a screen where you can modify it.
Remove To remove an entry, select it and click Remove. The ISG50 confirms you want to remove
it before doing so.