


Managing Arrays & Partitions
129
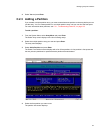
You select a drive by highlighting it and pressing Enter. Each selected drive turns gray in the drive list.
After you press
Enter
for the number of drives you entered previously, the system automatically begins
the expansion. To skip a drive, use the ↑ or ↓ key.
To toggle the display between the drive model number, serial number, and the node and WWN, press T.
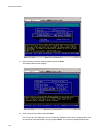
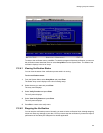
Expansion begins and the percentage completed displays. to return to the array menu, press Esc. To
check the progress of the expansion, you can use the expand status described below or select Array
Menu from the System Menu. The status of the expansion displays in the list of arrays.
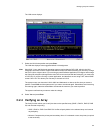
C.2.6.1 Viewing Expand Status
You can view the status of the expansion process while it is running.
To view expand status:
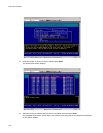
1 From the System Menu, select Array Menu and press Enter.
The Select Array screen displays with a list of existing arrays.
2 Select the array you want and press Enter.
The array menu displays.
3 Select Expand Function and press Enter
The expand menu displays.
4 Select View Expand Status and press Enter
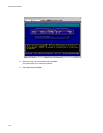
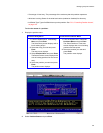
The Expand Status screen displays.
5
Press
Esc
to return to the expand menu.
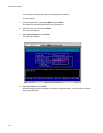
C.2.7 Changing an Array Name
You can change the name of an array. This does not affect the target ID or LUN values of the array. The
Galaxy 65 Subsystem does not allow you to change an array name when a utility is running.
To change an array name:
1 From the System Menu, select Array Menu and press Enter.
The Select Array screen displays with a list of existing arrays.
2 Select the array you want and press Enter.
The array menu displays.
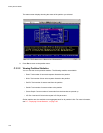
3 Select Change Array Name and press Enter
The Enter New Name screen displays.
4
Enter the name you want to use and press
Enter
.
You can use up to 20 characters. You can include any characters in the name, including spaces.
The system confirms that you want to make the change.