


Galaxy 65 User Guide
142
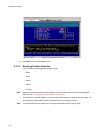
C.3.6 Changing the Read-Ahead Cache Size
You can change the read-ahead cache setting for each partition. This setting controls how much data the
Galaxy 65 reads ahead and stores in its cache memory during sequential reads.
If you want to change this size, you should be prepared to monitor the system performance using the
array statistics and adjust the size until you find the optimal size for your application.
The default setting is one chunk for the first access in a sequential read and one stripe for all subsequent
accesses. The size of the chunk is based on the chunk size used when you created the array (default is
64 kb). The Storage Managers treat volumes and mirrored arrays (RAID 1) internally as if they have a
stripe size of 64 kb, even though they are not striped.
If you specify a read-ahead cache size, that amount of data is read first, and the same amount is read for
all read-ahead accesses.
Read-ahead is triggered by two back-to-back accesses to consecutive logical block address (LBA)
ranges. Read-head can be forward (that is, increasing LBAs) or reverse (that is, decreasing LBAs).
Setting the read-ahead size to 0 turns off read-ahead cache. This is useful if the host is triggering read-
ahead for what are random accesses. This can happen if the host breaks up the random I/O into two
smaller reads, triggering read-ahead. You can use the partition statistics read histogram to determine
what size accesses the host is doing.
Setting the read-ahead size to a very large size (say four to five stripes worth) can help improve the
performance of multiple (three or more) sequential read streams, in some cases improving performance
by three times. This would be useful for providing multiple video streams, for example.
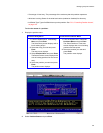
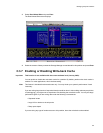
To change the read-ahead size:
1 Display the partition menu.
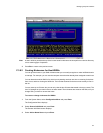
2
Select
Change Cache Params
and press
Enter
.
Change Cache Params screen displays.
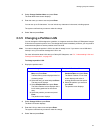
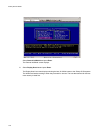
From the Array Menu From the All Partitions Menu
1 From the System Menu, select Array
Menu
and press
Enter
.
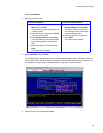
The Select Array screen displays with a list
of existing arrays.
2 Select the array you want and press Enter.
The array menu displays.
3
Select
Partition Menu
and press
Enter
.
The Select Partition screen displays with a
list of existing partitions for the current
array.
4 Select the partition you want and press
Enter.
The partition menu displays.
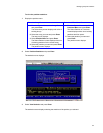
1 From the System Menu, select All
Partitions Menu
and press
Enter
.
The Select Partition or Free Area
screen displays with a list of
existing partitions and free space.
2 Select the partition you want and
press
Enter
.
The partition menu displays.