2 – Using SANbox Manager
Installing SANbox Manager
2-2 59048-04 Rev. B
D
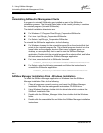
Your switch was shipped with either a SANsurfer Management Suite Disk or a
SANbox2 Installation Disk. Refer to the following installation instructions that
correspond to your situation:
SANsurfer Management Suite Disk - Windows Installation
SANsurfer Management Suite Disk - Linux Installation
SANsurfer Management Suite Disk - Solaris Installation
SANbox Manager Installation Disk - Windows Installation
SANbox Manager Installation Disk - Linux Installation
SANbox Manager Installation Disk - Solaris Installation
2.1.1
SANsurfer Management Suite Disk - Windows Installation
To install the SANsurfer application on Windows from the SANsurfer®
Management Suite Disk, do the following:
1. Close all programs currently running, and insert the SANsurfer Management
Suite Disk into the management workstation CD-ROM drive. If the
SANsurfer Management Suite start page does not open in your default
browser, do the following:
a. Using Windows Explorer, double-click the drive letter which contains
the SANsurfer Management Suite Disk.
b. Locate and double-click the Start_Here.htm file to open the SANsurfer
Management Suite start page in your default browser.
2. On the SANsurfer Management Suite start page, click the SANbox Switch
Software button.
3. On the SANbox Switch Software page, scroll to the SANbox2 (2Gb) Series
area.
4. In the Operating System column, click the Win NT/2000 link.
5. Click the SANsurfer Management Software link to open the File Download
dialog.
6. You have a choice of running the installation file from the CD-ROM or
downloading the installation file to your hard drive. Choose one of the
following:
Open the installation file from the CD-ROM and follow the SANbox
Manager installation instructions.
Specify a location in which to save the
sansurfer_windows_install.exe file, and click the Save button.
Double-click the saved sansurfer_windows_install.exe file and
follow the SANsurfer installation instructions.


