Sending Scan Files by E-mail
36
4
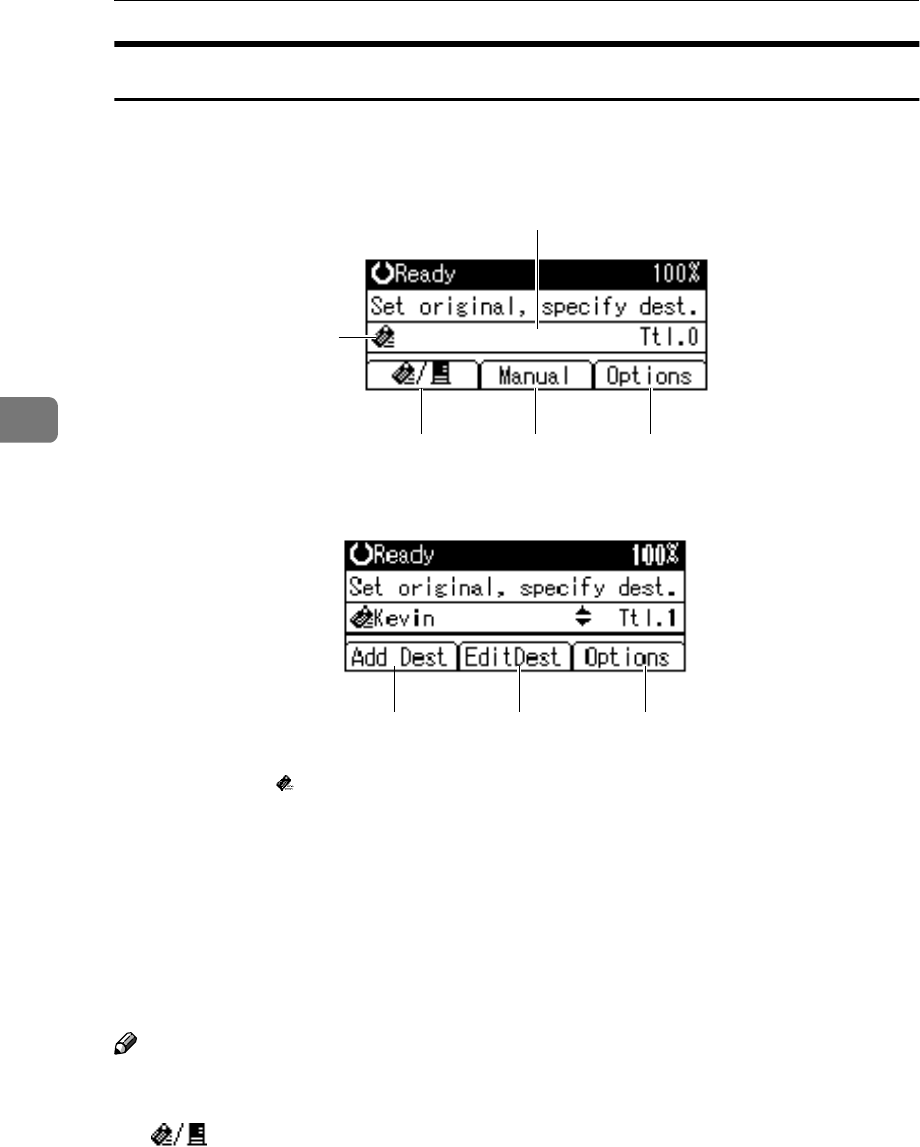
E-mail Screen
These screens are shown when using the machine for e-mail .
❖
❖❖
❖ Main display
❖
❖❖
❖ When a destination is selected.
1. E-mail icon ( )
Indicates that the E-mail screen is dis-
played.
2. Destination field
Displays the selected destination. If
multiple destinations are selected, the
destinations are displayed in the or-
der they were selected by pressing
{
{{
{U
UU
U}
}}
} or {
{{
{T
TT
T}
}}
}.
Note
❒ Press the {
{{
{Check Destination}
}}
} key to
check the selected destination.
3.
[]E-mail/Network Delivery
Scanner
Press to switch between the e-mail
function and the network delivery
scanner function.
4.
[Manual]
When specifying a destination that is
not registered, press [Manual], and
then enter the e-mail address of the
destination using the Quick Dial keys.
5.
[Options]
Press to make the scan settings such as
resolution or scan size, the sender, the
subject of the e-mail to be sent, and the
file type of the scan file attached to the
e-mail if necessary.
6.
[Add Dest]
When selecting multiple destinations
after a manual entry of an e-mail ad-
dress, press [
Add Dest
], and then enter
the e-mail address of the destination.
7.
[EditDest]
When changing an e-mail address that
has been entered, press [
EditDest
], and
then enter the new e-mail address.
2
1
345
AAH018S
678
AAH025S


