Using the Network Delivery Scanner Function
52
5
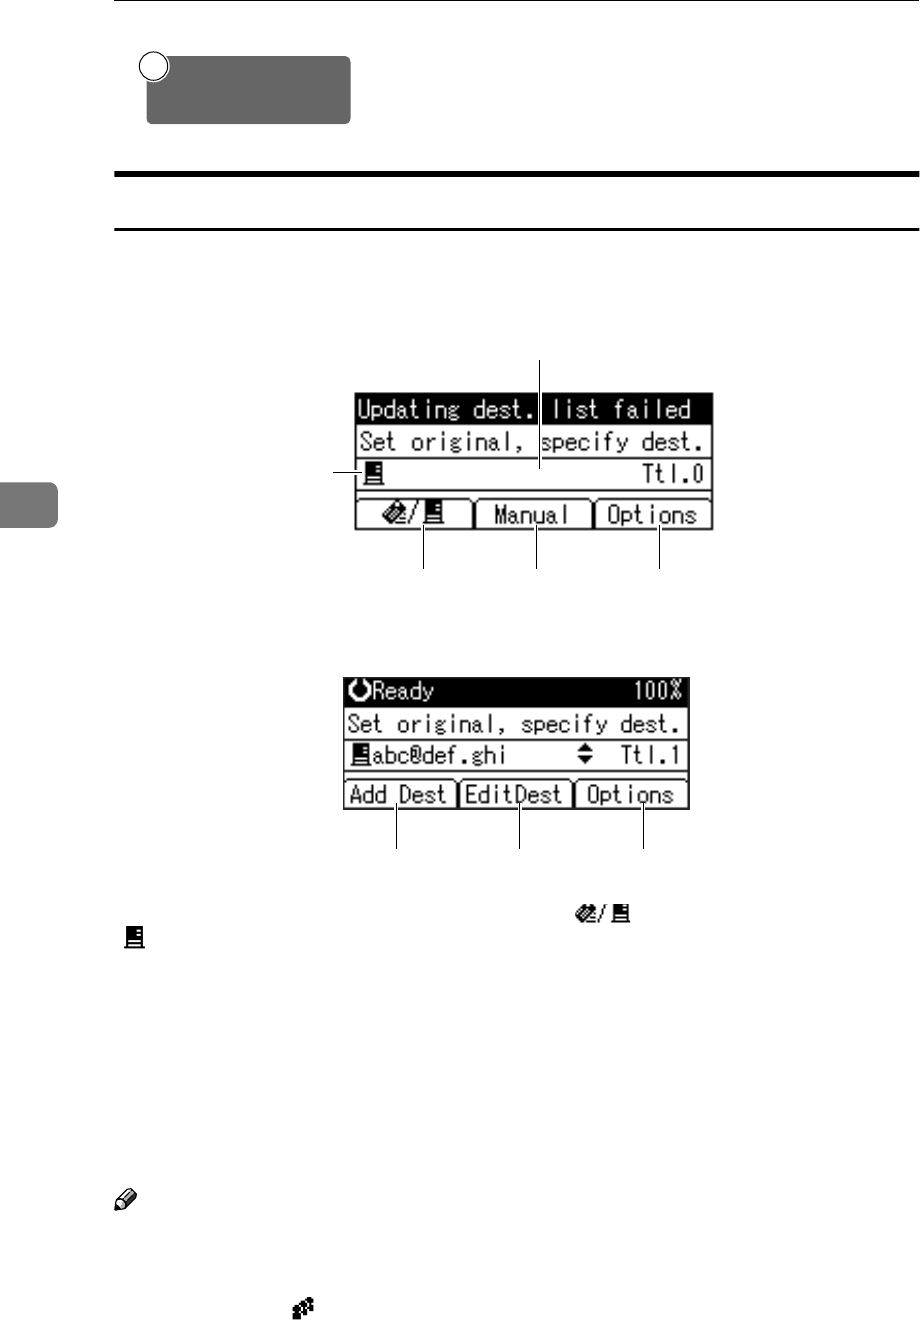
Network Delivery Scanner Screen
These screens are shown when using the machine as a network delivery scanner.
❖
❖❖
❖ Main display
❖
❖❖
❖ When a destination is selected
1.
Network Delivery Scanner icon
()
Indicates that the Network Delivery
Scanner screen is displayed.
2. Destination field
Displays the selected destination. If
multiple destinations are selected, the
destinations are displayed in the or-
der they were selected by pressing
{
{{
{U
UU
U}
}}
} or {
{{
{T
TT
T}
}}
}.
Note
❒ Press the {
{{
{Check Destination}
}}
} key to
check the selected destination.
❒ Group destinations are denoted by
this symbol ( ).
3.
[ ] E-mail/Network Delivery
Scanner
Press to switch between the network
delivery scanner function and the e-
mail function.
4.
[Manual]
When specifying a destination that is
not registered, press [Manual], and
then enter the e-mail address of the
destination using the Quick Dial keys.
5.
[Options]
Press to make the scan settings such as
resolution or scan size, the sender,
and the subject of the e-mail to be sent.
On the client computers, install the application required for
viewing or retrieving files by connecting to the delivery server,
such as DeskTopBinder V2 Lite.
See p.22 “DeskTopBinder V2 Lite”.
6
Install Client Computer
Software
2
34 5
1
AAH019S
67
5
AAH023S
