Network setup (CLX-3185N/CLX-3185WK/CLX-3185FN/CLX-3185FW only)_ 5
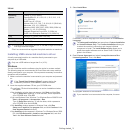
7. If the test page prints out correctly, click Yes.
If not, click No to reprint it.
8. To register as a user of the machine in order to receive information from
Samsung website, click On-line Registration.
If your machine is not connected yet to the network, click How to
connect?. How to connect? gives detailed information about the
how to connect the machine. Follow the instructions in the window.
9. Click Finish.
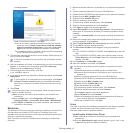
•After the driver setup is completed, you may enable firewall.
•If your printer driver does not work properly, follow the step below to
repair or reinstall the driver.
a)Make sure that the machine is connected to your machine and
powered on.
b)From the Start menu, select Programs or All Programs >
Samsung Printers > your printer driver name >
Maintenance.
c)Select the option as you wish, follow the instruction on the
window.
Macintosh
1. Make sure that the machine is connected to your network and powered
on. Also, your machine’s IP address should have been set.
2. Insert the supplied software CD into your CD-ROM drive.
3. Double-click the CD-ROM icon that appears on your Macintosh desktop.
4. Double-click the MAC_Installer folder.
5. Double-click the Installer OS X icon.
6. Enter the password and click OK.
7. The Samsung Installer window opens. Click Continue.
8. Read the license agreement and click Continue.
9. Click Agree to agree to the license agreement.
10. Select Easy Install and click Install. Easy Install is recommended for
most users. All components necessary for machine operations will be
installed.
If you select Custom Install, you can choose individual components to
install.
11. The message which warns that all applications will close on your
computer appears. Click Continue.
12. Select Typical installation for a network printer for a network printer
and then click OK.
13. The SetIP program automatically runs. If the machine has already
configured network information, close the SetIP program.
14. Click OK to continue the installation.
15. The Fax Queue Creator window appears during the installation
process.
•For CLX-3185N/CLX-3185WK, click Cancel to go to the next step.
•For CLX-3185FN/CLX-3185FW, select your machine name from the
Printer Name list and click Create. When the confirmation window
appears, click OK.
16. Click Continue on the Read me window.
17. After the installation is finished, click Restart.
18. Open the Applications folder > Utilities > Print Setup Utility.
•For Mac OS X 10.5~10.6, open the Applications folder > System
Preferences and click Print & Fax.
19. Click Add on the Printer List.
•For Mac OS X 10.5~10.6, click the “+” icon. A display window will pop
up.
20. For Mac OS X 10.3, select the IP Printing tab.
•For Mac OS X 10.4, click IP Printer.
•For Mac OS X 10.5~10.6, click IP.
21. Select HP Jetdirect - Socket in Protocol.
When printing a document containing many pages, printing
performance may be enhanced by choosing Socket for Printer
Type option.
22. Enter the machine’s IP address in the Address input field.
23. Enter the queue name in the Queue input field. If you cannot determine
the queue name for your machine server, try using the default queue
first.
24. For Mac OS X 10.3, if Auto Select does not work properly, select
Samsung in Printer Model and your machine name in Model Name.
•For Mac OS X 10.4, if Auto Select does not work properly, select
Samsung in Print Using and your machine name in Model.
•For Mac OS X 10.5~10.6, if Auto Select does not work properly, choose
Select Printer Software and your machine name in Print Using.
Your machine appears on the Printer List, and is set as the default
machine.
25. Click Add.
If the printer driver does not work properly, uninstall the driver and
reinstall it.
Follow steps below to uninstall the driver for Macintosh.
a)Make sure that the machine is connected to your computer and
powered on.
b)Insert the supplied software CD into your CD-ROM drive.
c)Double-click CD-ROM icon that appears on your Macintosh desktop.
d)Double-click the MAC_Installer folder.
e)Double-click the Installer OS X icon.
f)Enter the password and click OK.
g)The Samsung Installer window opens. Click Continue.
h)Select Uninstall and click Uninstall.
i)When the message which warns that all applications will close on
your computer appears, click Continue.
j)When the uninstall is done, click Quit.
Linux
You need to download Linux software packages from the Samsung website
to install the printer software (http://www.samsung.com/printer).
To install other software:
•See "Installing the SmartPanel" on page 5.
•See "Installing the Printer Settings Utility" on page 5.
Install Linux Driver and add network Printer
1.Make sure that the machine is connected to your network and
powered on. Also, your machine’s IP address should have been set.
2.Download the Unified Linux Driver package from the Samsung
website.
3.Extract the UnifiedLinuxDriver.tar.gz file and open the new directory.
4.Double-click the Linux folder.
5.Double-click the install.sh icon.
6.The Samsung Installer window opens. Click Continue.
7.The Add printer wizard window opens. Click Next.
8.Select Network printer and click Search button.
9.The Printer’s IP address and model name appears on list field.


