5.5 <
Copying>
Selecting the type of originals
Press the Basic tab and select an appropriate original type.
• Text: Use for originals containing mostly text.
• Text/Photo: Use for originals with mixed text and photographs.
• Photo: Use when originals are photographs.
• Magazine: Use when originals are magazines.
Color Mode
Select the color mode you want to use.
• Color: Copys the originals in color.
• B/W: Copys the originals in black and white.
• Auto: The machine automatically senses the color of the originals
and copys in color or b/w according to the originals.
Changing the darkness
This defines the degree of darkness. Use left/right arrows to change the
level of light/dark in the printouts.
Using special copy features
On the Advanced tab or the Image tab of the Copy screen, you can
select specific copy features.
Merging multiple jobs as a single copy
This feature allows you to merge multiple copy jobs into a single copy. For
example, if you need to use the DADF and the scanner glass for a copy
job, you can use this feature. In the picture below, each number means
each segment order.
① Segment 1 from the DADF.
② Segment 2 from the
scanner glass.
③ Segment 3 from the DADF.
④ Segment 4 from the
scanner glass.
⑤ Segment 5 from the DADF.
䓄
䓅
䓆
䓈
䓇
Note
When the machine enters power saver mode, the jobs in the
segment list will be deleted to prevent accessing by the
unexpected users.
1 Press Copy from the Main screen.
2 Select the tray in Paper Supply.
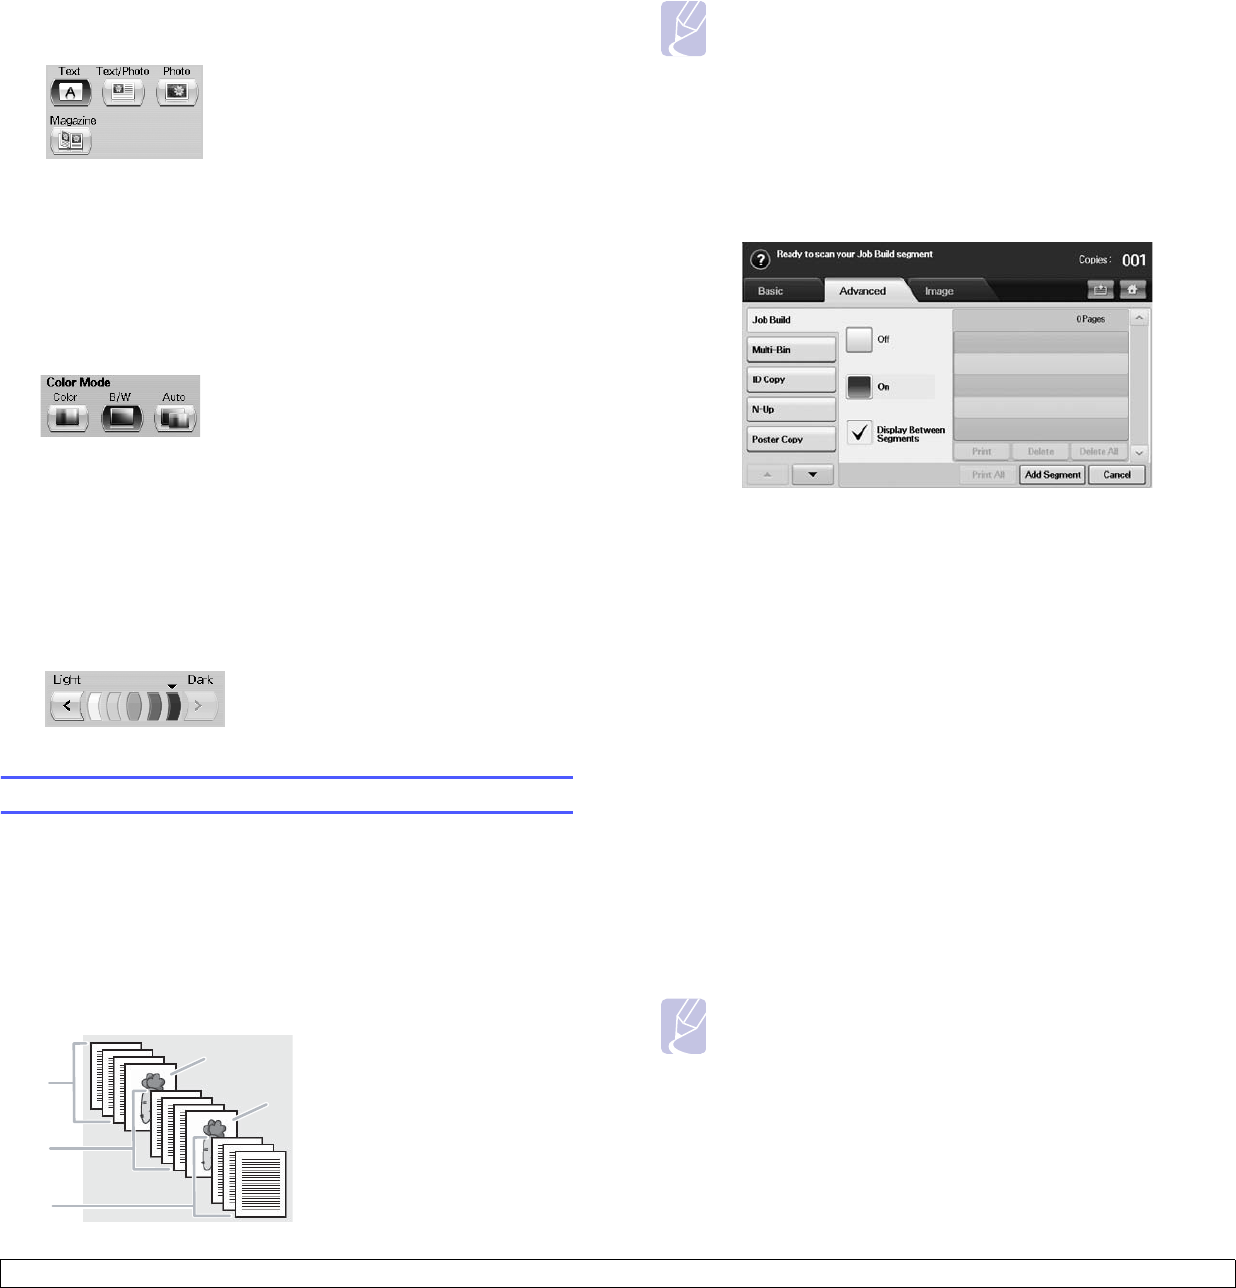
3 Press the Advanced tab > Job Build.
4 Press On to enable job build function.
- Off: Disables Job Build feature.
- On: Enables Job Build feature.
- Display Between Segments: After executing a segment, the job is
paused with this screen. is displayed Then the user can select to
keep copying or stop.
- Print: Prints the sample page(s) of a segment to confirm the
contents.
- Delete: Deletes a segment.
- Delete All: Deletes all segments.
- Print All: Prints all segments.
- Add Segment: Adds a new segment.
- Cancel: Removes all segments in the list, and cancels the job.
5 Press Add Segment.
6 Place originals, face up, in the DADF, or you can use the scanner
glass with a single original document face down.
7 Press Start on the control panel.
Then the machine starts scanning.
8 Repeat step 5 to step 7.
Note
As long as the hard drive capacity of your device remains, you
can add segments without any restriction.
9 After adding segments, press Print All.


