Crossfading events
You can crossfade between two events on the same channel. Crossfading fades out one event’s volume while another event’s volume
fades in.
Fade in volume line
Fade out volume line
Note:
You can show or hide the crossfade length ToolTip by selecting Event and then Show Crossfade Lengths from the Options
menu or pressing Ctrl+Shift+T.
Using automatic crossfades
The automatic crossfades features turns the overlapping portions of two events into a crossfade. From the Options menu, choose Event,
and then choose Automatic Crossfades or press Ctrl+Shift+X to turn automatic crossfades on and off.
Events before crossfade Events after crossfade
Drag one event to
overlap the other.
When Automatic Crossfades is turned off, overlapping events punch in and out with no fades.
Manually setting a crossfade
An automatic crossfade is not inserted if a shorter event is placed within the same time frame of a longer event. In this case, the longer
event begins playing, then the shorter event plays (punch in), and then the longer event resumes playing. You can manually create a
crossfade to fade in or out of the shorter event.
This is a fast and effective method of inserting a voiceover on top of background music (although the music fades out completely) or to
replace a bad section of audio.
1.
Place the mouse pointer on one of the shorter event’s handles. The fade cursor ( ) appears.
2.
Drag the handle to the desired position.
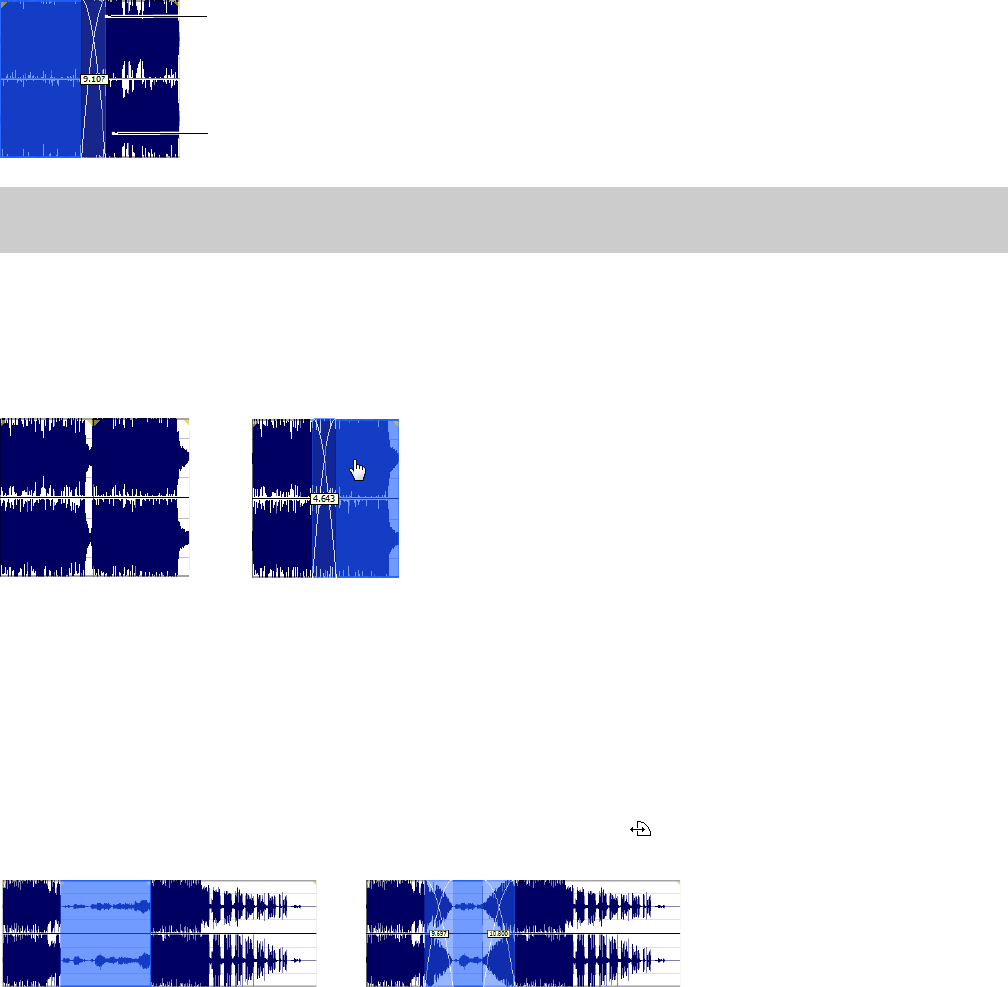
Events without crossfade Events with manual crossfade
USING THE EVENT TOOL | 165


