


Item Description
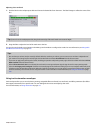
Timing tightness
Choose a setting from the drop-down list to specify the resolution for beat anchors
(). For
example, if you wanted to quantize beat anchors to sixteenth notes, choose Sixteenth
Notes from the drop-down list.
Quantized beat anchors are displayed as . If the you choose a resolution from the
Timing
tightness drop-down list that is too coarse, you'll notice that not all beat markers will be
quantized.
Stretch spacing
Choose a setting from the drop-down list to specify how many stretch markers
( or ) will
be displayed along the bottom of the waveform display.
Audio that contains rapid notes such as drum rolls will benefit from setting the divisions at a
smaller fraction of a beat. Slower-paced material, however, may actually suffer from high
resolution.
Redetect Beats Click to automatically detect the beats in the current file. Use this button to apply the ACID
beat-detection algorithm to existing media.
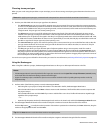
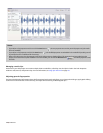
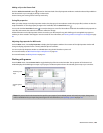
Adjusting stretch markers for loop clips
Stretch markers correspond to subdivisions of beats in the audio file. These markers tell ACID where to divide the audio when
performing time stretching to match tempo. Accurately detecting these beats is the key to making the time-compression process
sound good..
Marker Description
Indicates a stretch-only marker that was detected by the software or added manually.
Indicates a combination beat/stretch marker. Each beat marker on the beat ruler corresponds to a combination beat/stretch marker on the timeline.
If you want to convert a combination beat/stretch marker to a stretch-only marker, double-click the marker (or right-click the marker and choose
Convert to Stretch Marker from the shortcut menu).
Indicates an inactive stretch marker.
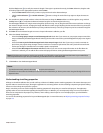
When Sliced segments is selected from the Stretching method drop-down list, beat markers represent the points where silence
will be inserted to accomplish stretching. Stretch-only markers are not used in this mode and are displayed in gray.
Tip:
Use the Zoom In Time (Up) () and Zoom Out Time (Down) () buttons to change the magnification of the waveform.
As a general rule, markers that are excessively close to each other may cause clicks in the audio. However, markers should not be more
than one second apart, or pitch and echo artifacts may result.
You can add, move, and delete stretch markers on the Stretch tab. If snapping is enabled, markers will snap to the current grid spacing.
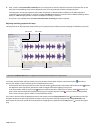
Moving stretch markers
You can drag any marker to a new location. If you move a combination stretch/beat marker ( ), its associated beat marker ( ) will also be
moved.
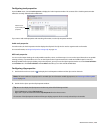
Adding stretch markers
Double-click the marker bar at the bottom of the waveform display to create a new marker. It is advantageous to add new markers if the
software does not detect any quick subdivisions in beats.
The biggest cause of audio artifacts due to time compression is a lack of beat detection. Make sure that you add markers anywhere the
application fails to put one on a pronounced beat.
Deleting markers
You can remove a user-defined marker by right-clicking and choosing Delete from the shortcut menu (or by double-clicking a disabled
marker).
Double-click a combination stretch/beat marker to remove the beat marker , or double-click a stretch marker to delete it.
Resetting stretch markers
Click the Reload button ( ) to reset the markers to their last-saved positions.
120 | CHAPTER 7