


Adding media to your project
After you’ve added media to your library, tagged it, and searched for specific files or related media, you’ve probably found just the right
piece of media for your current project.
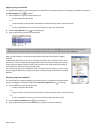
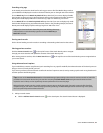
You can add media to your project from the Search Results pane by performing any of the following actions:
• Dragging a file from the Search Results pane to the project timeline. The file is added wherever you drop it.
Tip:
You can also drag files from the Search Results pane to the Windows desktop, a folder, or to another application that is an OLE
(object linking and embedding) drop target.
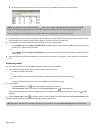
• Double-clicking a media file in the Search Results pane (if the Double-click in Search Results pane adds media to project check
box is selected in the Media Manager Options dialog). The file is added to the bottom of the track list.
• Right-clicking a media file in the Search Results pane and choose Add to Project from the shortcut menu. The file is added to the
bottom of the track list.
If the file is offline, you’ll be prompted to locate the file or choose a replacement. For more information, see Resolving offline media files
below.
Resolving offline media files
An offline media file is a file that is no longer available to the Media Manager. Media may be classified as offline if you eject removable
storage after adding a file to your library or change a file’s name or location.
1.
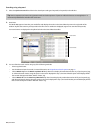
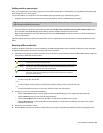
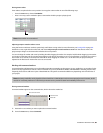
Add media to your project or preview media files. If any of the files are not accessible, the Resolve Offline Media dialog is displayed
with a listing of offline files and their status:
Icon Status Description
Offline The file listed in the Offline File column cannot be found. The status will be Offline if you did
not search or browse for a replacement file.
Probable
Match
The file listed in the Offline File column will be replaced by the file listed in the Replacement
File column. A status of Probable Match indicates that the Media Manager tool found a
likely replacement file when you clicked Smart Search.
Found The file listed in the Offline File column will be replaced by the file listed in the Replacement
File column. A status of Found indicates that you chose the file you want to use after
clicking the Browse button.
2.
Select the files you want to resolve:
• To select a single file, click the file.
—or—
• To select multiple consecutive files, click the first file, hold the Shift key, and then click the last item.
—or—
• To select multiple files that are not consecutive, hold the Ctrl key and click each file.
3.
Specify how you want to resolve the selected files:
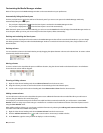
• Click the Smart Search button to search quickly and allow the Media Manager tool to suggest the replacement file.
• Click the Browse button to choose a specific replacement file.
• Click the Leave Offline button to leave the file offline. The file will not be added to your project.
• Click the Remove button to remove the file from the media library. The file will not be added to your project. The original
media file is not deleted.
4.
Repeat step 3 for each file in the list.
5.
Click the OK button to preview the files or add the files to your project and update the media library with the replacement files.
USING THE MEDIA MANAGER | 79