5.
Select the Arm for Record buttons ( ) on the track where you want to record. Arming a track enables it for recording.
When a track is armed, the track meter displays the track's level. If input monitoring is not on, the meter displays the level of your
input source. If input monitoring is turned on, the meter shows the level of the input source plus the track effects chain.
6.
Click the Record button ( ) on the Transport bar to start recording.
7.
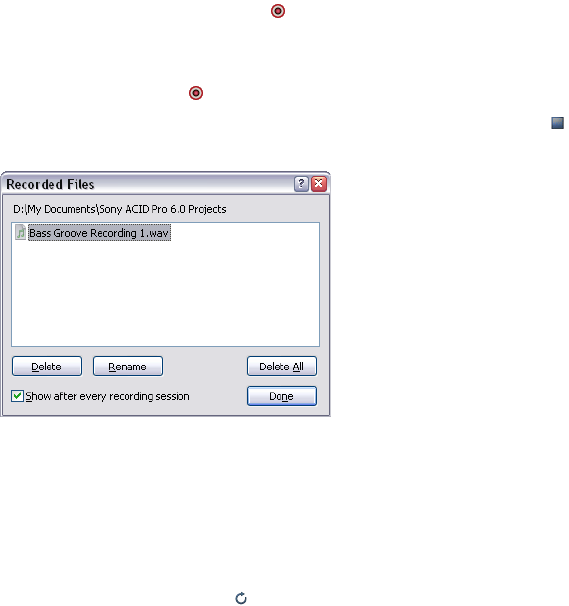
To stop recording, click the Record button again or click the Stop button ( ) on the Transport bar. The Recorded Files dialog is
displayed.
8.
Use the Recorded Files dialog to confirm the file name and location of your recorded audio. Click Delete or Delete All if you do not
want to save the recorded files, or click Rename to change the file's name.
9.
Click Done to close the Recorded Files dialog. Your recorded file is displayed as a new event in the timeline.
Working with multiple recorded clips
Clicking the Loop Playback button ( ) on the transport bar enables you to continually create clips during recording. The last clip
recorded is set as the track’s active clip. You can use clips as different versions of a recorded event that you can quickly switch between
to choose the best one.
During recording with loop playback enabled, the time selection continually repeats and starts recording a new clip until you stop
recording. You can preview, select, rename, and delete clips in the Clip Pool pane of the Track Properties window to manage the clips.
For more information, see Using the Clip Pool to manage clips on page 104.
The Clip Properties window will display region markers to represent the selected event’s clip in the waveform. For more information, see
Configuring clip properties on page 115.
Specifying where recordings are stored
Recorded files are saved in the folder specified on the Folders tab of the Preferences dialog is used by default.
If you want to choose a project-specific recorded files folder, you can use the Recorded files folder box on the Audio tab of the Project
Properties dialog.
Changing where recorded files are stored for new projects
1.
From the Options menu, choose Preferences.
2.
Click the Folders tab.
3.
Choose a setting from the Record drop-down list or click the Browse button to choose a folder.
4.
Click OK.
Changing where recorded files are stored for individual projects
1.
From the File menu, choose Properties. The Project Properties dialog appears.
2.
Click the Audio tab to display the project’s audio properties.
3.
Click the Browse button next to the Recorded files folder box.
4.
Browse for the location where you want to save recorded files.
5.
Click OK.
RECORDING AUDIO | 185
