


Scan Plastic Cards
file:///C|/Documents%20and%20Settings/mcampbell.AM/My%20Documents/ADS2000solutions/chapter3_2_13.html[3/11/2013 10:24:18 AM]
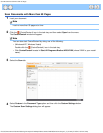
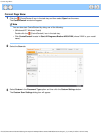
5
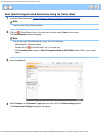
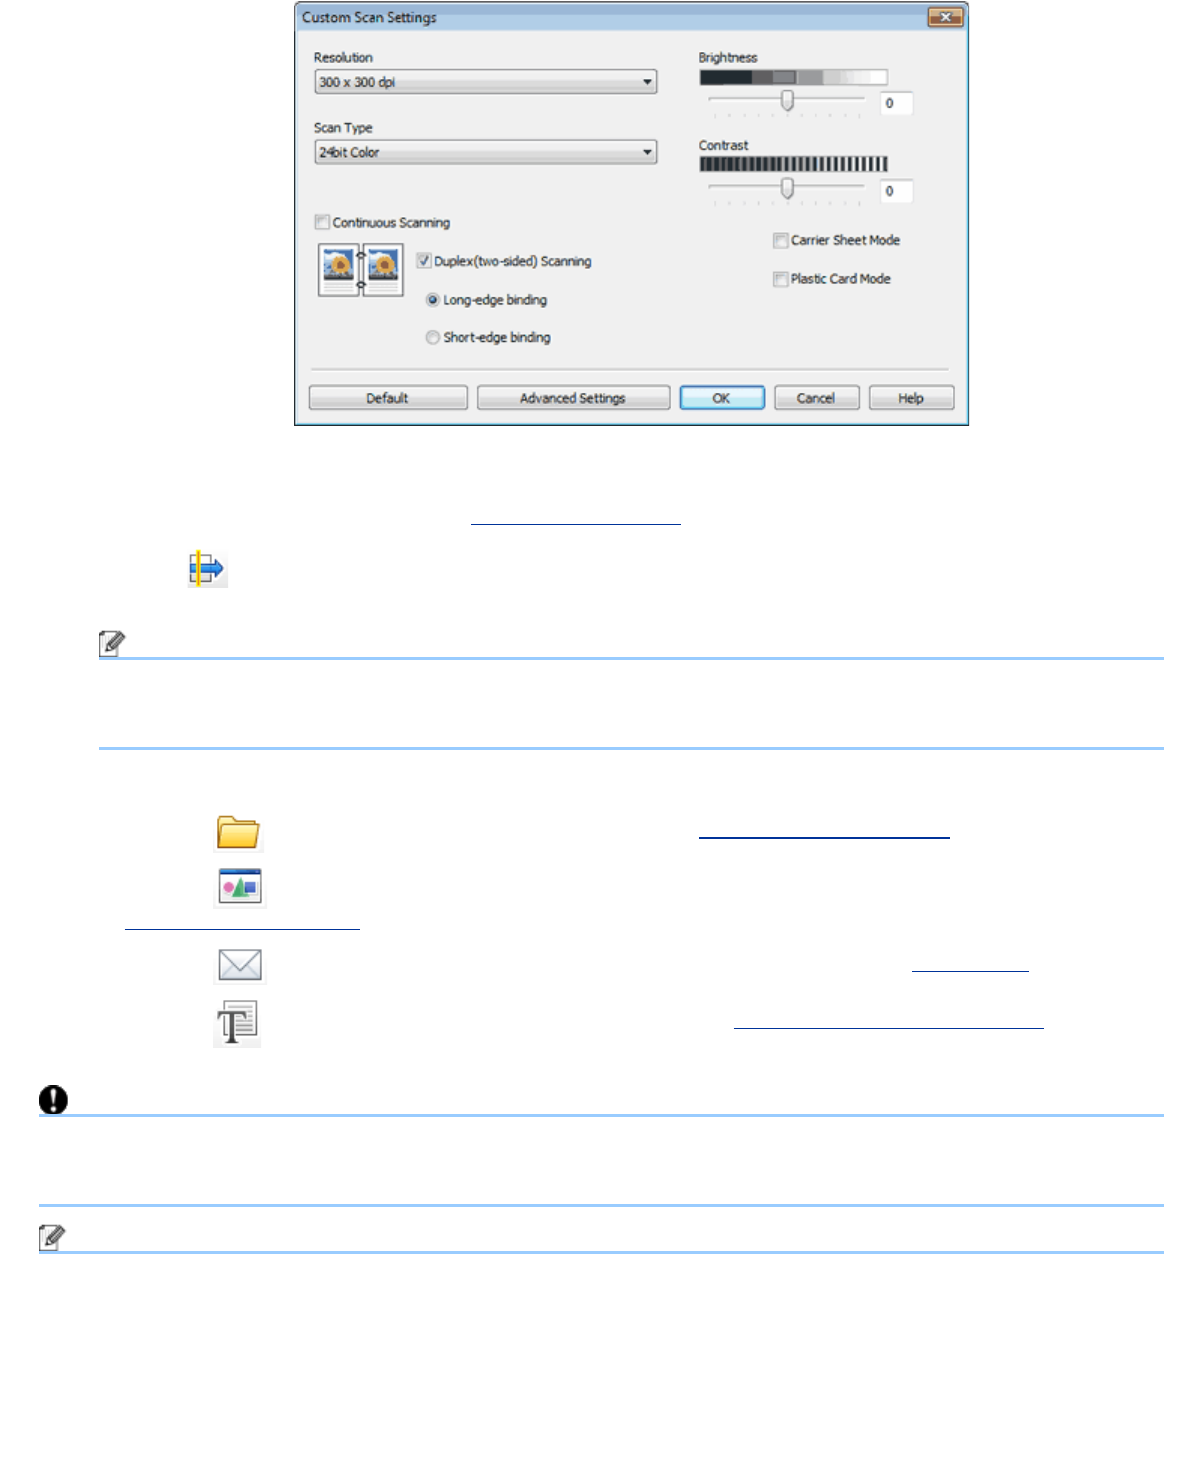
Check the Plastic Card Mode check box.
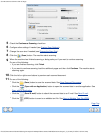
6
Configure other settings if needed (see Custom Scan Settings).
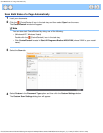
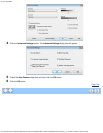
7
Click the (Scan) button. The machine starts scanning, and then the Scanning Completed dialog box will
appear and display the number of scanned pages. The scanned image appears in the image viewer.
Note
If the Scanning Completed dialog box does not appear and you want to display the number of scanned
pages, check the Display Scanning Results check box.
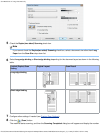
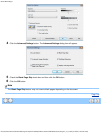
8
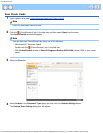
Do one of the following:
•
Click the
(Save) button to save the scanned data. See Save Scanned Documents.
•
Click the
(Open with an Application) button to open the scanned data in another application. See
Open with an Application
.
•
Click the (Send E-mail) button to attach the scanned data to an E-mail. See Send E-mail.
•
Click the
(OCR) button to scan to an editable text file. See Scan to Editable Text File (OCR).
Important
If a feed error should occur while scanning, open the front cover and carefully remove the plastic card in order to
prevent damage to the card.
Note
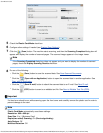
Plastic Card Mode automatically uses these settings:
Resolution: 600 x 600 dpi
Scan Size: 2 in 1 (Business Card)
Duplex(two-sided) Scanning: On (Short-edge binding)
Auto Deskew: Off
Multifeed Detection: Off