188 How to customize the MAX 200
How to change the system features (continued)
Plotter setup (continued)
Folder (continued)
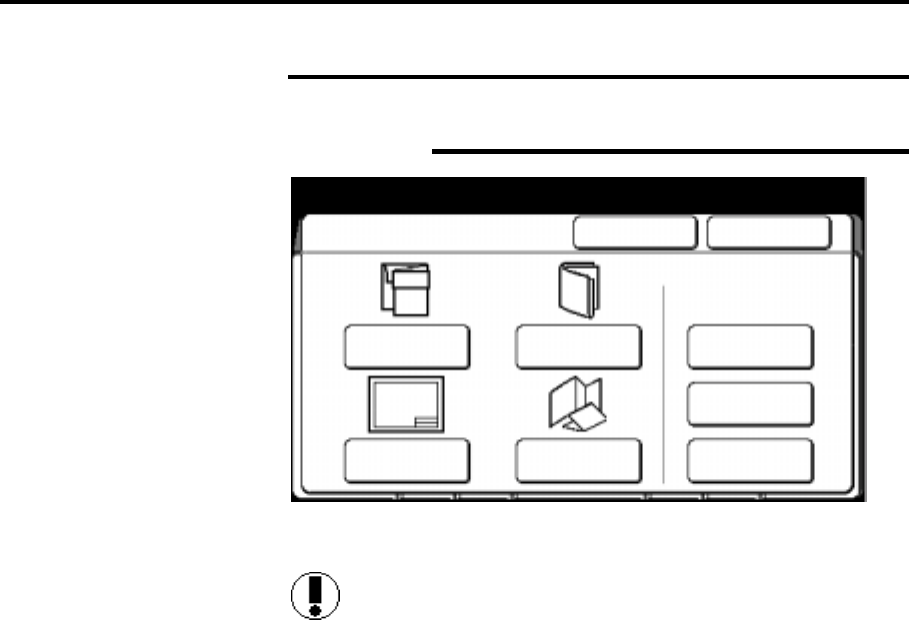
5. Select the desired fold default for plot mode; P1, P2, no fold, or
P3. To change P1, P2, or P3 parameters, refer to page 203.
Caution: You can set up P1, P2, or P3 to folds other than P1=
fan fold, P2 = cross fold, and P3 = special fold at the folder, but the
above screen displays P1= fan fold, P2 = cross fold, and P3 =
special fold. Ensue to power off and power on, the folder, after
changing any of the folds, other than what is displayed on the above
touch screen.
Fan fold
Produces copies folded to A-size, but all panels
may not be equal in size. With fan fold you can
add a binding margin.
Cross fold
Produces copies folded in A-size, with all panels
of equal size. You can not add a binding margin
when cross fold is selected.
No fold
If no fold is selected, the right column of the
screen changes to the exit column. Select the
desired exit option; printer or folder.
Special fold
Produces other folds according to the setup of
the folder. If your folder provides other fold
operations, follow the folder user guide to set
the machine to the other fold.
Select the P3 option, to set the fold default to
special fold.
Fan fold
P1
No Fold
Cross fold
P2
Special fold
P3
Binding
Margin
Punch Tab &
Reinforce
First Fold
Only
Additional
Features
Folde
Cancel Done


