


Chapter 19 Pool
UNS Series User’s Guide
79
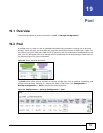
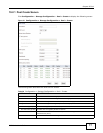
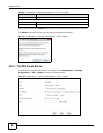
19.2.3 Pool Expand Screen
Click Configuration > Storage Configuration > Pool > Expand to display the following screen.
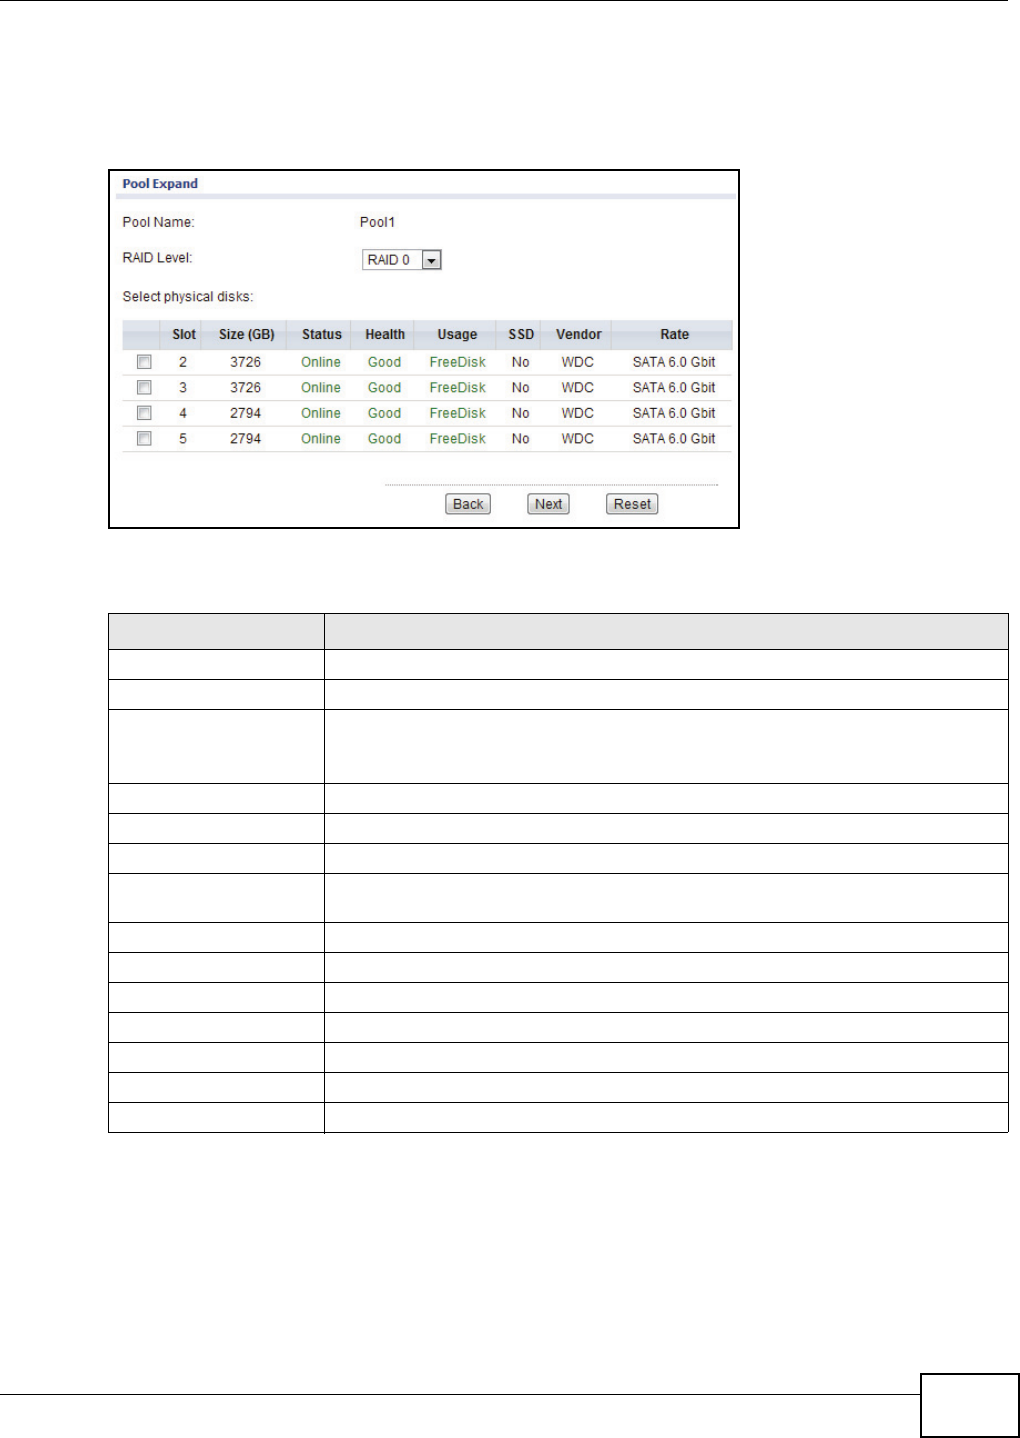
Figure 53 Configuration > Storage Configuration > Pool > Expand
The following table describes the items on this screen.
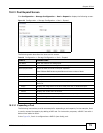
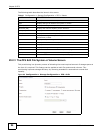
19.2.3.1 Expanding a Pool
The following instructions provide an example for expanding a pool capacity. In the example, Pool1
is used to expand its capacity by adding a RAID set. For instruction purposes, a RAID 5 set with 4
disks will be added to Pool1.
In the Figure 54, Pool1 is configured as a RAID 0 (two disks) pool.
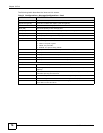
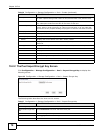
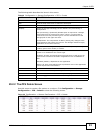
Table 38 Configuration > Storage Configuration > Pool > Expand
LABELS DESCRIPTIONS
Pool Name Enter the name for the storage pool.
RAID Level Click this to select the RAID type for the storage pool.
Select physical disks Select the disks to include in the pool expansion.
Note: Different RAID levels require different minimum number of disks.
Slot Displays the slot location on the device.
Size (GB) Displays the total capacity of the disk.
Status Displays the current status of the disk: Online / Failed.
Health Displays the current health of the disk: Good, Failed, Error alert, Read errors, or
Reserved.
Usage Displays the usage status of the disk: RAID, Free disk, or Dedicated spare.
SSD Identifies if the disk is an SSD device: No / Yes.
Vendor Displays the vendor name of the disk.
Rate Displays the disk rate: SAS 3/6 (GB/s), SATA 1.5/3/6 (Gb/s)
Back Click Back to go to the previous screen.
Next Click Next to continue and confirm the changes.
Reset Click Reset to discard the changes.