


150 CHAPTER 3: DEVICE CONFIGURATION
Creating Groups and
Button Mappings
Telephone Button Mappings are part of a device. You assign a set of
mappings to an individual by associating a particular device or group to
that user.
A user can see the Button Mappings in effect for an assigned telephone
by logging on to the NBX NetSet utility with a personal password. The
user can also use the NBX NetSet utility to create and print labels for the
Access Buttons on the telephone.
An administrator can define the button mappings for telephone groups
and also define exceptions to the group mappings for individual
telephones.
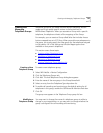
To create groups and button mappings:
1 Select NBX NetSet >
Device Configuration > Telephone Groups.
2 Click Add, type a Group Name, and click OK.
3 Click the
Group that you want to apply mappings to.
4 Click
Button Mappings.
To define button mappings for an individual telephone:
1 Select NBX NetSet >
Device Configuration > Telephones.
2 Click the telephone that you want to apply mappings to.
3 Click
Button Mappings.
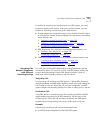
Button Mapping Notes
■ Not all Button Type functions are available on all models of
telephones.
■ The use of the Prty (priority) and Number fields depend on the
selected Button Type function.
■ The Ring field is used to enable and disable ringing for a lone
appearance button and to set delayed ringing patterns. See “
Creating
a Delayed Ringing Pattern” on page 149 for details.
■ A Lock check box at the Group Mappings level lets you control button
inheritance behavior. If you lock
a button at the Group Mappings
level, a change made to the Group always passes to every telephone
in the Group. If you clear the
Lock box at the Group Mappings level,
you can override the mapping at the device level. An icon at the
device level indicates whether the button can be remapped.