164 CHAPTER 3: DEVICE CONFIGURATION
If you auto discover the Attendant Console, do so after you have auto
discovered all telephones, Analog Terminal Adapters, and Analog
Terminal Cards. The Auto Discovery process maps all existing telephones
to the Attendant Console.
This section covers these topics:
■ Adding an Attendant Console
■ Modifying an Attendant Console
■ Viewing Attendant Console Status
■ Removing an Attendant Console
■ Configuring Attendant Console Buttons
■ Changing Attendant Console IP Settings
Adding an Attendant
Console
On a SuperStack 3 NBX system, you can configure up to 100 Attendant
Consoles; on an NBX 100 system, you can configure up to 50. For either
system, you can associated at most 3 Attendant Consoles with any one
telephone.
To add a new NBX 1105 Attendant Console:
1 Select NBX NetSet >
Device Configuration > Attendant Console.
2 The Add Attendant Console dialog box appears.
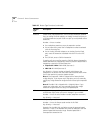
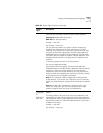
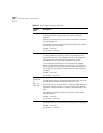
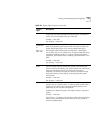
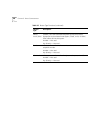
3 Fill in the fields for the new Attendant Console, as described in Table 27
.
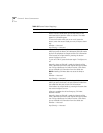
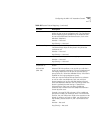
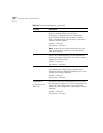
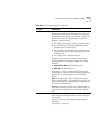
Table 27 Add Attendant Console Fields
Field Purpose
MAC Address The MAC (Media Access Control) address of the Attendant
Console (appears on the label on the bottom of the device.
Device Name (Optional) A name that identifies this device when it
appears in lists in the NBX NetSet utility.
Associated Telephone The telephone extension to associate with this Attendant
Console. Each Attendant Console must be associated with
a single NBX Business Telephone.


