


Managing Extensions 57
recommends that you take advantage of the Auto Discovery process. For
instructions on using the Auto Discovery process or manually adding and
configuring a new telephone, see the section on “
Adding a New
Telephone” on page 125.
You can define a user in the system database without assigning a telephone
to that user. By defining a user with no device, but with a telephone
extension only, you create a phantom mailbox. The NBX system associates
an extension with this phantom mailbox so that the user can have voice
mail capability. To access voice mail from any telephone, the user calls
either extension 500 (the default Auto Attendant extension), or 501 (the
default Auto Attendant voice mail extension.)
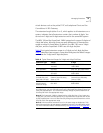
Telephones and Line Card ports reserve most of the extensions within the
system. However, there are other extensions within the system. Table 8
shows the default extension ranges for 3-digit and 4-digit dial plans.
Modifying Extensions You can modify the extension number of any device in the system.
Normally, you make changes only after you have changed the extension
ranges for the NBX system, in order to align the extensions with the new
ranges.
CAUTION: Be very careful when you change extensions. The system does
not validate changes that you make here, and there is no Undo or Cancel
function. A mistake can compromise the operation of the system.
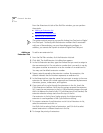
To modify extensions:
1 From the NBX NetSet main menu, click Dial Plan > Operations > Modify
Extensions to open the Modify Extensions dialog box.
2 In the extensions list, select the extensions that you want to modify. Use
Shift-click to select a block of extensions or Ctrl-click to select several
extensions at different locations in the list.
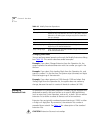
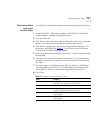
3 Select an operation from the Operation drop-down list. Table 10
lists and
describes the operations.
4 Make the appropriate entry in the text box to the right of the Operation
list. The system uses this number in conjunction with the operation that
you selected in step 3. For examples, see “
Changing Extensions” below.
5 Click Apply. If the requested change creates a duplicate extension or an
extension of zero length, the change is discarded.
6 Click OK to enable your changes and exit the dialog box.