


Installation and Getting Started Guide
The software adds the offset value to the routing metric (cost) of the routes that match the ACL. If a route matches
both a global offset list and an interface-based offset list, the interface-based offset list takes precedence. The
interface-based offset list’s metric is added to the route in this case.
You can configure up to 24 global RIP offset lists and up to 24 RIP offset lists on each interface.
USING THE CLI
To configure a global RIP offset list, enter commands such as the following:
HP9300(config)# access-list 21 deny 160.1.0.0 0.0.255.255
HP9300(config)# access-list 21 permit any
HP9300(config)# router rip
HP9300(config-rip-router)# offset-list 21 out 10
The commands in this example configure a standard ACL. The ACL matches on all IP networks except 160.1.x.x.
When the routing switch advertises a route that matches ACL 21, the offset list adds 10 to the route’s metric.
Syntax: [no] <acl-number-or-name> in | out offset [ethernet <portnum>]
In the following example, the routing switch uses ACL 21 to add 10 to the metric of routes received on Ethernet
port 2/1.
HP9300(config-rip-router)# offset-list 21 in ethernet 2/1
USING THE WEB MANAGEMENT INTERFACE
You cannot configure this option using the Web management interface.
Changing the Administrative Distance
By default, the routing switch assigns the default RIP administrative distance (120) to RIP routes. When
comparing routes based on administrative distance, the routing switch selects the route with the lower distance.
You can change the administrative distance for RIP routes.
NOTE: See “Changing Administrative Distances” on page 10-30 for a list of the default distances for all route
sources.
USING THE CLI
To change the administrative distance for RIP routes, enter a command such as the following:
HP9300(config-rip-router)# distance 140
This command changes the administrative distance to 140 for all RIP routes.
Syntax: [no] distance <num>
USING THE WEB MANAGEMENT INTERFACE
1. Log on to the device using a valid user name and password for read-write access. The System configuration
panel is displayed.
2. Click on the plus sign next to Configure in the tree view to expand the list of configuration options.
3. Click on the plus sign next to RIP in the tree view to expand the list of RIP option links.
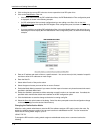
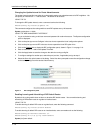
4. Click on the General
link to display the RIP configuration panel, shown in Figure 7.1 on page 7-10.
5. Edit the value in the Distance field.
6. Click the Apply button to save the change to the device’s running-config file.
7. To configure settings for another port, select the port (and slot, if applicable) and go to step 5.
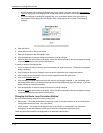
8. Select the Save
link at the bottom of the dialog. Select Yes when prompted to save the configuration change
to the startup-config file on the device’s flash memory.
7 - 6