


Advanced Configuration and Management Guide
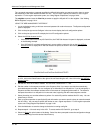
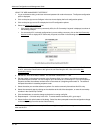
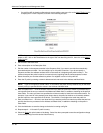
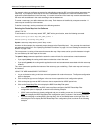
• If a prefix list ACL is already configured and you are adding a new one, click on the Add IP Prefix List
link
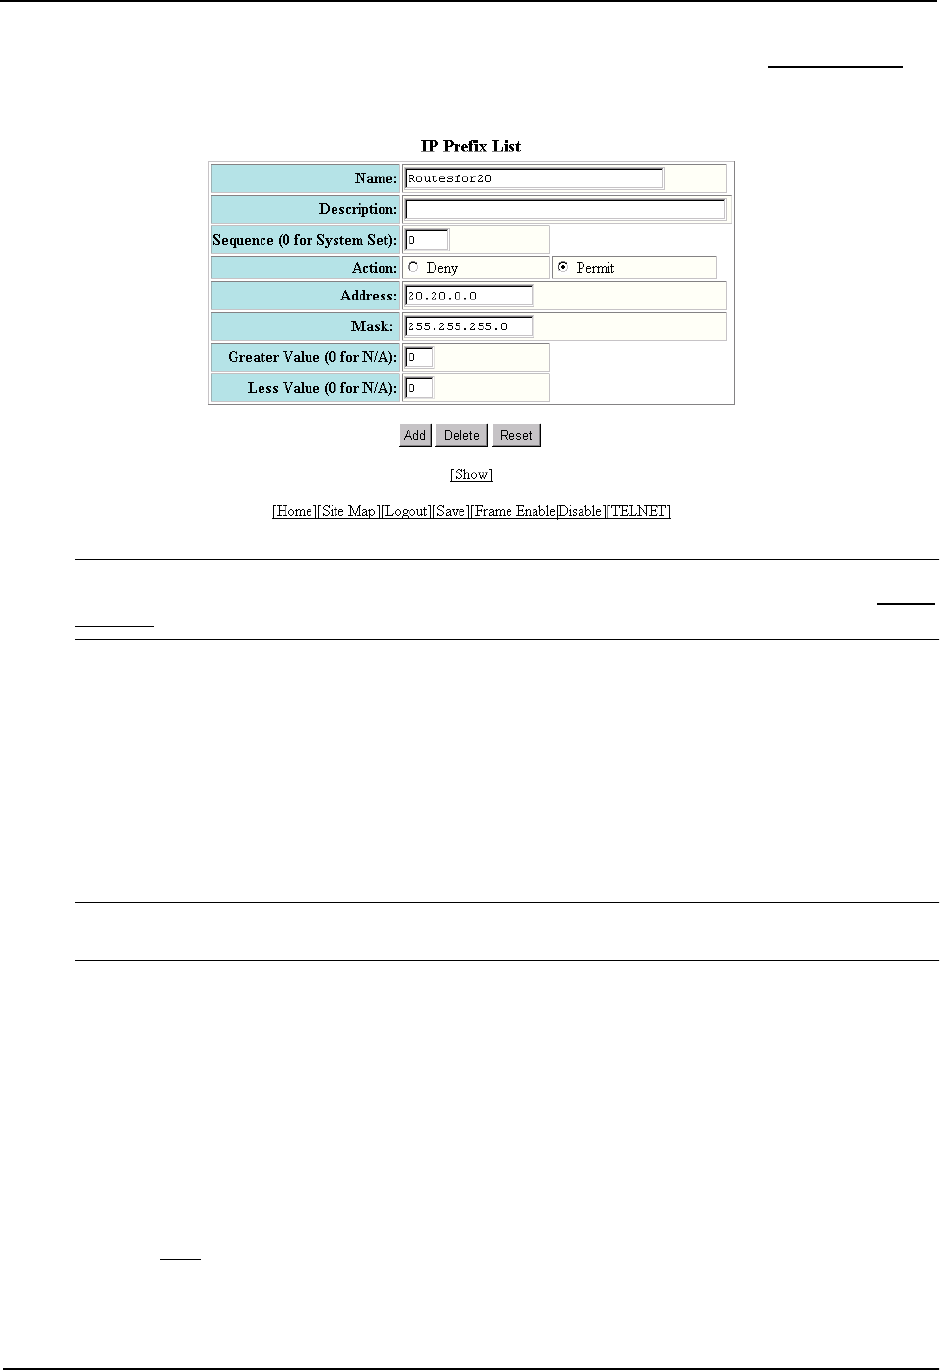
to display the IP Prefix List panel, as shown in the following example.
NOTE: You cannot modify an IP prefix list ACL. Instead, you can delete and then re-add the ACL. To
delete an ACL, click on the Delete button to the right of the row describing the ACL, then click on the Add IP
Prefix List link.
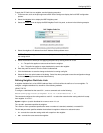
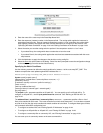
5. Edit a name in the Name field.
6. Enter a description in the Description field.
7. Edit the number in the sequence number in the Sequence field, if you want to override the automatically
generated sequence number. You can configure up to 100 prefix list entries. If you do not specify a
sequence number, the software numbers them in increments of 5, beginning with prefix list entry 5. The
software interprets the prefix list entries in numerical order, beginning with the lowest sequence number.
8. Select the action you want the software to perform if a neighbor’s route is in this prefix list.
9. Enter the IP prefix by entering a network address and sub-net mask in the Address and Mask fields.
NOTE: If you do not specify a Greater Value or Less Value, this prefix list entry matches only on the exact
network prefix you specified with the values in the Address and Mask fields.
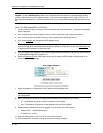
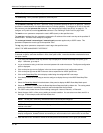
10. Enter a number from 1 – 32 in the Greater Value field if you want the prefix list to match on prefixes that are
more specific than the one you entered in the Address and Mask fields, in addition to matching on the prefix in
those fields. The value you enter here specifies the minimum number of mask bits in the network mask. For
example, if you enter 24 in the example panel shown above, the prefix list matches on all network numbers
that are equal to or more specific than 20.20.0.0. Thus 20.20.1.0 and higher also match the prefix list.
11. Enter a number from 1 – 32 in the Less Value field if you want the prefix list to match on prefixes that are less
specific than the one you entered in the Address and Mask fields, in addition to matching on the prefix in
those fields.
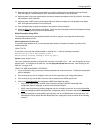
12. Click the Add button to save the change to the device’s running-config file.
13. Repeat steps 5 – 12 for each IP prefix list entry.
14. Select the Save link at the bottom of the dialog. Select Yes when prompted to save the configuration change
to the startup-config file on the device’s flash memory.
10 - 56