


Configuring BGP4
The metric [+ | - ]<num> | none parameter sets the MED (metric) value for the route. The default MED value is 0.
You can set the preference to a value from 0 – 4294967295.
• set metric <num> – Sets the route’s metric to the number you specify.
• set metric +<num> – Increases route’s metric by the number you specify.
• set metric -<num> – Decreases route’s metric by the number you specify.
• set metric none – Removes the metric from the route (removes the MED attribute from the BGP4 route).
The next-hop <ip-addr> parameter sets the IP address of the route’s next hop router.
The origin igp | incomplete parameter sets the route’s origin to IGP or INCOMPLETE.
The tag <tag-value> parameter sets the route’s tag. You can specify a tag value from 0 – 4294967295.
NOTE: This parameter applies only to routes redistributed into OSPF.
NOTE: You also can set the tag value using a table map. The table map changes the value only when the
routing switch places the route in the IP route table instead of changing the value in the BGP route table. See
“Using a Table Map To Set the Tag Value” on page 10-68.
The weight <num> parameter sets the weight for the route. You can specify a weight value from
0 – 4294967295.
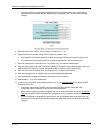
USING THE WEB MANAGEMENT INTERFACE
NOTE: To simplify testing and configuration, you can specify an option and then choose whether to activate it.
To activate an option, select the checkbox in front of the option’s field. Leave the checkbox unselected to leave
the option inactive.
1. If you have just added the route map and the map is displayed in the BGP Route Map Filter panel, go to
step 7. Otherwise, go to step 2.
2. Log on to the device using a valid user name and password for read-write access. The System configuration
panel is displayed.
3. Click on the plus sign next to Configure in the tree view to expand the list of configuration options.
4. Click on the plus sign next to BGP in the tree view to expand the list of BGP option links.
5. Click on the Route Map Filter
link to display a table listing the configured BGP route maps.
6. Click Modify next to the route map you want to configure to display the map in the BGP Route Map Filter
panel.
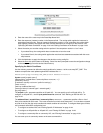
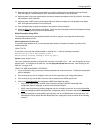
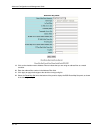
7. Select the Route Map Set
link at the bottom of the panel to display the BGP Route Map Set panel.
8. Select the sequence (instance) from the Route Map Name Sequence field’s pulldown list.
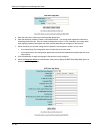
9. Optionally select the origin. You can select IGP or Incomplete. Also select the checkbox in front of the field.
10. Optionally enter AS numbers to append to the AS path. Also select the checkbox in front of the field.
11. Optionally select Auto Tag. The routing switch calculates and sets an automatic tag value for the route.
12. If you did not select Auto Tag and you instead want to set the tag value manually, enter a tag value from
0 – 4294967295 in the Tag field. Also select the checkbox in front of the field.
13. Optionally select the community type and also select the checkbox.
14. For a private community, enter the community number in the Number field. You can enter more than one
community. Use commas or spaces to separate the community names.
15. Select Additive of you want the Set statement to add the specified community.
10 - 67