


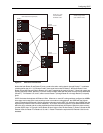

Configuring OSPF
Configuring an NSSA
To configure an NSSA, use one of the following methods.
USING THE CLI
To configure OSPF area 1.1.1.1 as an NSSA, enter the following commands.
HP9300(config)# router ospf
HP9300(config-ospf-router)# area 1.1.1.1 nssa 1
HP9300(config-ospf-router)# write memory
Syntax: area <num> | <ip-addr> [nssa <cost> | stub <cost> [no-summary]]
The <num> | <ip-addr> parameter specifies the area number, which can be a number or in IP address format. If
you specify an number, the number can be from 0 – 2,147,483,647.
The nssa parameter specifies that this is an NSSA. For more information about configuring NSSAs, see “Assign
a Not-So-Stubby Area (NSSA)” on page 8-11.
The <cost> specifies an additional cost for using a route to or from this area and can be from
1 – 16777215. If you configure a stub area or NSSA, you must specify the cost. There is no default. Normal
areas do not use the cost parameter.
The no-summary parameter applies only to stub areas and disables summary LSAs from being sent into the
area. See “Assign a Totally Stubby Area” on page 8-11.
NOTE: You can assign one area on a routing switch interface. For example, if the system or chassis module has
16 ports, 16 areas are supported on the chassis or module.
To configure additional parameters for OSPF interfaces in the NSSA, use the ip ospf area… command at the
interface level of the CLI.
USING THE WEB MANAGEMENT INTERFACE
1. Log on to the device using a valid user name and password for read-write access.
2. If you have not already enabled OSPF, enable it by clicking on the Enable radio button next to OSPF on the
System configuration panel, then clicking Apply to apply the change.
3. Click on the plus sign next to Configure in the tree view to expand the list of configuration options.
4. Click on the plus sign next to OSPF in the tree view to expand the list of OSPF option links.
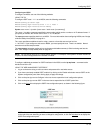
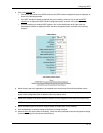
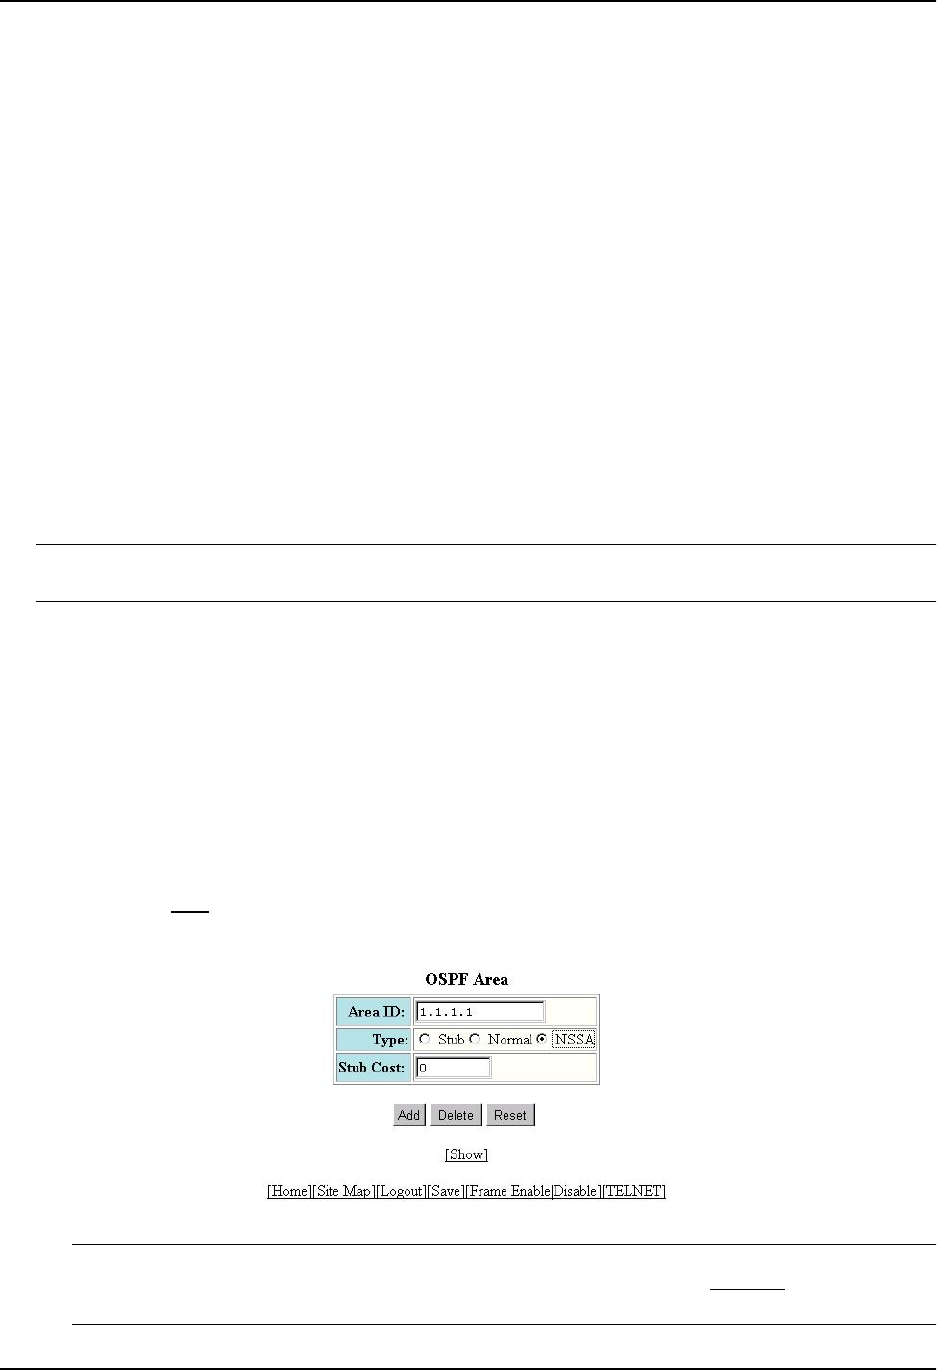
5. Click on the Area
link to display the OSPF Area configuration panel, as shown in the following figure.
NOTE: If the device already has OSPF areas, a table listing the areas is displayed. Click the Modify button
to the right of the row describing an area to change its configuration, or click the Add Area
link to display the
OSPF Area configuration panel.
8 - 13