


Installation and Getting Started Guide
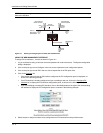
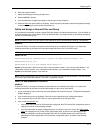
• If you are modifying an existing IPX RIP filter, click on the Modify button to the right of the row describing
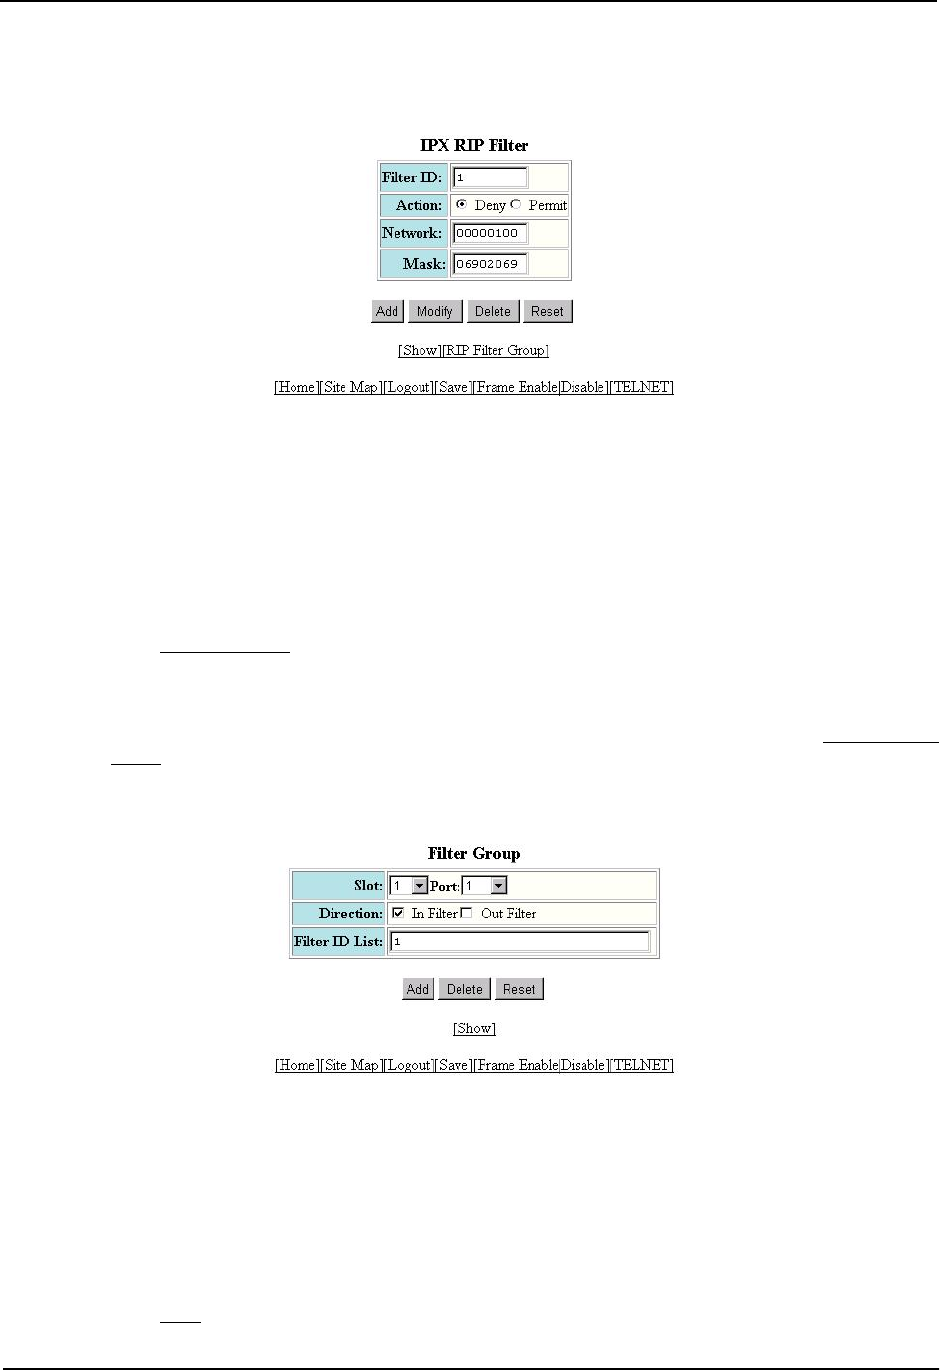
the filter to display the IPX RIP Filter configuration panel, as shown in the following example.
5. Enter a Filter ID value in the Filter ID field.
6. Select either Permit or Deny.
7. Enter the source network address on which you want to filter traffic in the Network field. You also can assign
a wildcard value of all zeros (00000000) to allow all entries. The zeroes appear as 'any' in the display.
8. Enter the source network address mask for the network address in the Mask field. You can assign a wildcard
value of all zeros (00000000) to allow all entries. The zeroes appear as 'any' in the display.
9. Click the Add button to apply the changes to the device’s running-config file.
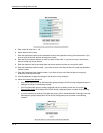
10. Select the RIP Filter Group
link.
• If the device does not have an IPX RIP filter group configured, the Filter Group configuration panel is
displayed, as shown in the following example.
• If an IPX RIP filter group is already configured and you are adding a new one, click on the Add RIP Filter
Group link to display the Filter Group configuration panel, as shown in the following example.
• If you are modifying an existing IPX RIP filter group, click on the Modify button to the right of the row
describing the group to display the Filter Group configuration panel, as shown in the following example.
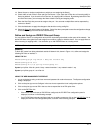
11. Select the port to which you want to assign the filter(s).
12. Check either or both of the In Filter and Out Filter boxes. If you check the In Filter box, all incoming traffic is
filtered. If you check the Out Filter box, all outgoing traffic is filtered. If you check both In Filter and Out Filter,
the assigned filters apply to both incoming and outgoing traffic.
13. Enter the filter ID(s) you want to assign to the port. You can enter multiple filter entries separated by commas
or blanks.
14. Click the Add button to apply the changes to the device’s running-config file.
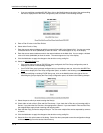
15. Select the Save
link at the bottom of the dialog. Select Yes when prompted to save the configuration change
to the startup-config file on the device’s flash memory.
14 - 8