4`22
Adding Names to a Phonebook
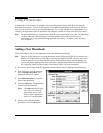
Follow these steps to add names to an existing phonebook.
1.
If necessary, open Eclipse FAX SE. (Remember that the HP OfficeJet LX Manager must be running.)
2.
From the Eclipse FAX SE menu bar, choose,
File/Open Phonebook
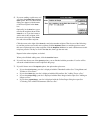
. The Phonebook dialog box appears.
3.
In the
Phonebook Title
box, type the name of the phonebook.
4.
For each entry`a person or company and related information`that you want to add to the phonebook,
do the following:
:
Complete the
Name
and
Fax
boxes, which are required.
Name
:
Type the name of the person or company as you want it to appear on cover pages. If you need
to add more than one entry for this person or company`a home fax number and an office fax
number, for example`you can put identifying information in parentheses. Text in parentheses does
not appear on cover pages.
Fax
: Type the fax number, including area code and dialing prefix, if necessary. See the table below
for more information about fax numbers.
:
Optionally, complete the
Company
,
Voice
,and
Notes
boxes.
Company
:
Type the name of the company where the person works. You can add any number of
names to a company. To use a company that is already in the phonebook, click the arrow to the right
of the
Company
box and choose the company you want. To see the names already added for a
company, select the company name; then click the arrow to the right of the
Name
box.
Voice
:
For your reference only, type the phone number of the person or company.
Notes
:
For your reference only, type a note about the person or company.
:
When you have finished entering information for this entry, click the
Add
button.
5.
When you have finished making additions to the phonebook, click the
OK
button.


