


99-00984-20-B0
43 | CHAPTER 5 – MAINTAINING AND TROUBLESHOOTING YOUR SMART BOARD
685ix INTERACTIVE WHITEBOARD SYSTEM
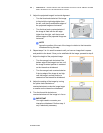
• If you don’t have a computer, use the projector’s default background so that
you can see the full projected image clearly.
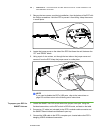
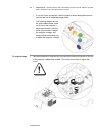
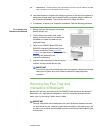
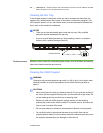
• The following diagram shows
the color-coded control knobs
on the top of the projector’s
adjustment module. Use only
these control knobs to adjust
the projector’s image, and
always unlock the locking ring
to adjust the projector’s image.
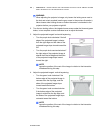
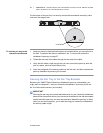
To align the image 1. Use the screwdriver to unscrew (but not remove) the locking ring screw on the top
of the projector’s adjustment module. This unlocks the controls to adjust the
mirror.