


46 | CHAPTER 5 – MAINTAINING AND TROUBLESHOOTING YOUR SMART BOARD
685ix INTERACTIVE WHITEBOARD SYSTEM
99-00984-20-B0
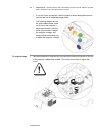
10. Use the screwdriver to tighten the locking ring screw on the top of the projector’s
adjustment module when you’re satisfied with the projected image’s location on
the interactive whiteboard. This locks the controls to adjust the mirror.
11. If necessary, re-center your interactive whiteboard. See the following procedure.
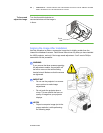
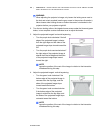
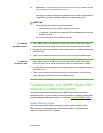
To re-center your
interactive whiteboard
1. Remove the pen tray and pen tray screws
behind the pen tray.
2. Pull the board from side to side, while
holding the bottom bezel of the interactive
whiteboard, to center the board on the
projected image.
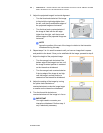
3. Refer to your SMART Board 685ix and
SBD685ix Interactive Whiteboard System
Textless Installation Guide (document
137394), for instructions on drilling holes for
attaching new anchors for the
interactive whiteboard.
4. Attach the pen tray screws to the new anchor
location, and then attach the pen tray.
IMPORTANT
If you do not secure the locking ring screw, the projector’s adjustment controls
can slip out of place, and you will have to repeat the image alignment
procedure.
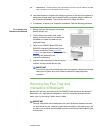
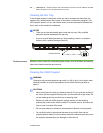
Securing the Pen Tray and
Interactive Whiteboard
Because the pen tray that comes with your SMART Board interactive whiteboard is
detachable, you might want to safeguard it—and the interactive whiteboard at the
same time—by anchoring it with a security cable.
IMPORTANT
Security cable locks are not designed to be a solid protection measure because
the lock can be torn out. However, potential thieves might be reluctant to try to sell
a product with a broken security cable lock hole, which would readily identify it as
a stolen item.