


56 | CHAPTER 5 – MAINTAINING AND TROUBLESHOOTING YOUR SMART BOARD
685ix INTERACTIVE WHITEBOARD SYSTEM
99-00984-20-B0
3. Check the pins on the power cable and VGA connectors, and make sure they
aren’t bent or broken.
4. Make sure the projector lamp is securely installed.
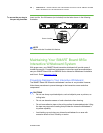
5. Confirm that your projector is turned on and that the projector status lights are lit.
If the projector displays unusual status lights similar to those listed on page 53,
use those patterns to troubleshoot the system.
Image Compatibility Issues
Partial, Scrolling or Incorrectly Displayed Image
Use this procedure only with Windows 95, Windows 98, Windows 2000 and
Windows XP operating systems on desktop computers.
NOTE
This procedure may vary depending on your version of Windows operating
system and your system preferences.
To resolve the partial,
scrolling or incorrectly
displayed image
1. Select Start > Control Panel.
2. Double-press Display.
3. Press Settings.
4. Verify that your display resolution setting is lower than or equal to WXGA
(1280 × 800).
IMPORTANT
If the projector is still not displaying the whole image, you will need to change
the monitor display that you’re using. Refer to the following procedure.
To change the
monitor display
1. Press Advanced Properties.
2. Press Change on the Monitor tab.
3. Press Show all devices, and then select Standard monitor types from the list.
4. Select the resolution you need in the Models list.
5. Verify that the resolution setting of the monitor display is lower than or equal to
WXGA (1280 × 800).