


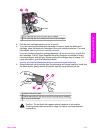

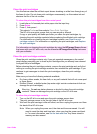

3 Lightly press down on the print cartridge to release it, and then pull it toward you
out of the slot.
Note Do not remove both print cartridges at the same time. Remove and clean
each print cartridge one at a time. Do not leave a print cartridge outside the
HP all-in-one for more than 30 minutes.
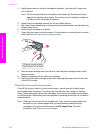
4 Inspect the print cartridge contacts for ink and debris buildup.
5 Dip a clean foam rubber swab or lint-free cloth into distilled water, and squeeze any
excess water from it.
6 Hold the print cartridge by its sides.
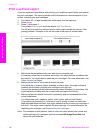
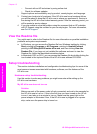
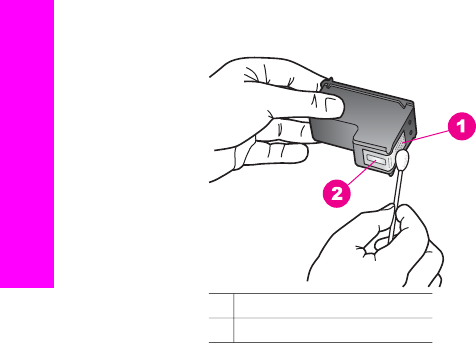
7 Clean only the copper-colored contacts. For information on cleaning the ink nozzle
area, see Clean the area around the ink nozzles.
1 Copper-colored contacts
2 Ink nozzles (do not clean)
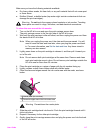
8 Slide the print cartridge back into the slot. Push the print cartridge forward until it
clicks into place.
9 Repeat if necessary for the other print cartridge.
10 Gently close the print-carriage access door and plug the power cord into the back
of the HP all-in-one.
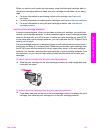
Clean the area around the ink nozzles
If the HP all-in-one is used in a dusty environment, a small amount of debris might
accumulate inside the device. This debris can include dust, hair, carpet, or clothing
fibers. When debris gets on the print cartridges, it can cause ink streaks and smudges
on printed pages. Ink streaking can be corrected by cleaning around the ink nozzles as
described here.
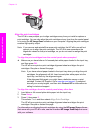
Note Clean the area around the ink nozzles only if you continue to see streaks and
smudges on your printed pages after you have already cleaned the print
cartridges by using the control panel or the HP Image Zone. For more
information, see Clean the print cartridges.
Chapter 14
116 HP Officejet 6200 series all-in-one
Maintain your HP all-in-one