Chapter 6 Advanced Operations
105Advanced Key Operations
To invert key signals
You can invert the black/white of key signals. This allows
you to use a key source as black characters against a white
background and white characters against a black
background.
To turn the key inversion function on, in the Key >M/E
Key1 >Key Source menu, press [Key Invert], turning it on.
To adjust the key position
For luminance keys, linear keys, and chroma keys, you can
move the edges of the key signal horizontally.
1
In the Key >M/E Key1 >Key Source menu, press [Key
Position], turning it on.
2
Set the following parameters with the knobs.
To turn the fine key function on
When the fine key function is on, you can make fine
adjustments to the left, right, top, and bottom edge
positions of the key signal.
Note
When fine key is on, the width of borders, drop borders,
drop shadows, and outlines is limited to a maximum to 4.
1
In the Key >M/E Key1 >Key Source menu, press [Fine
Key], turning it on.
2
Make fine adjustments to key edge positions by setting
the following parameters with the knobs.
Adjusting Key Borders
See “Adding Borders to Keys” (page 83) for more
information about how to make basic key border settings.
Applying 2-color borders
1
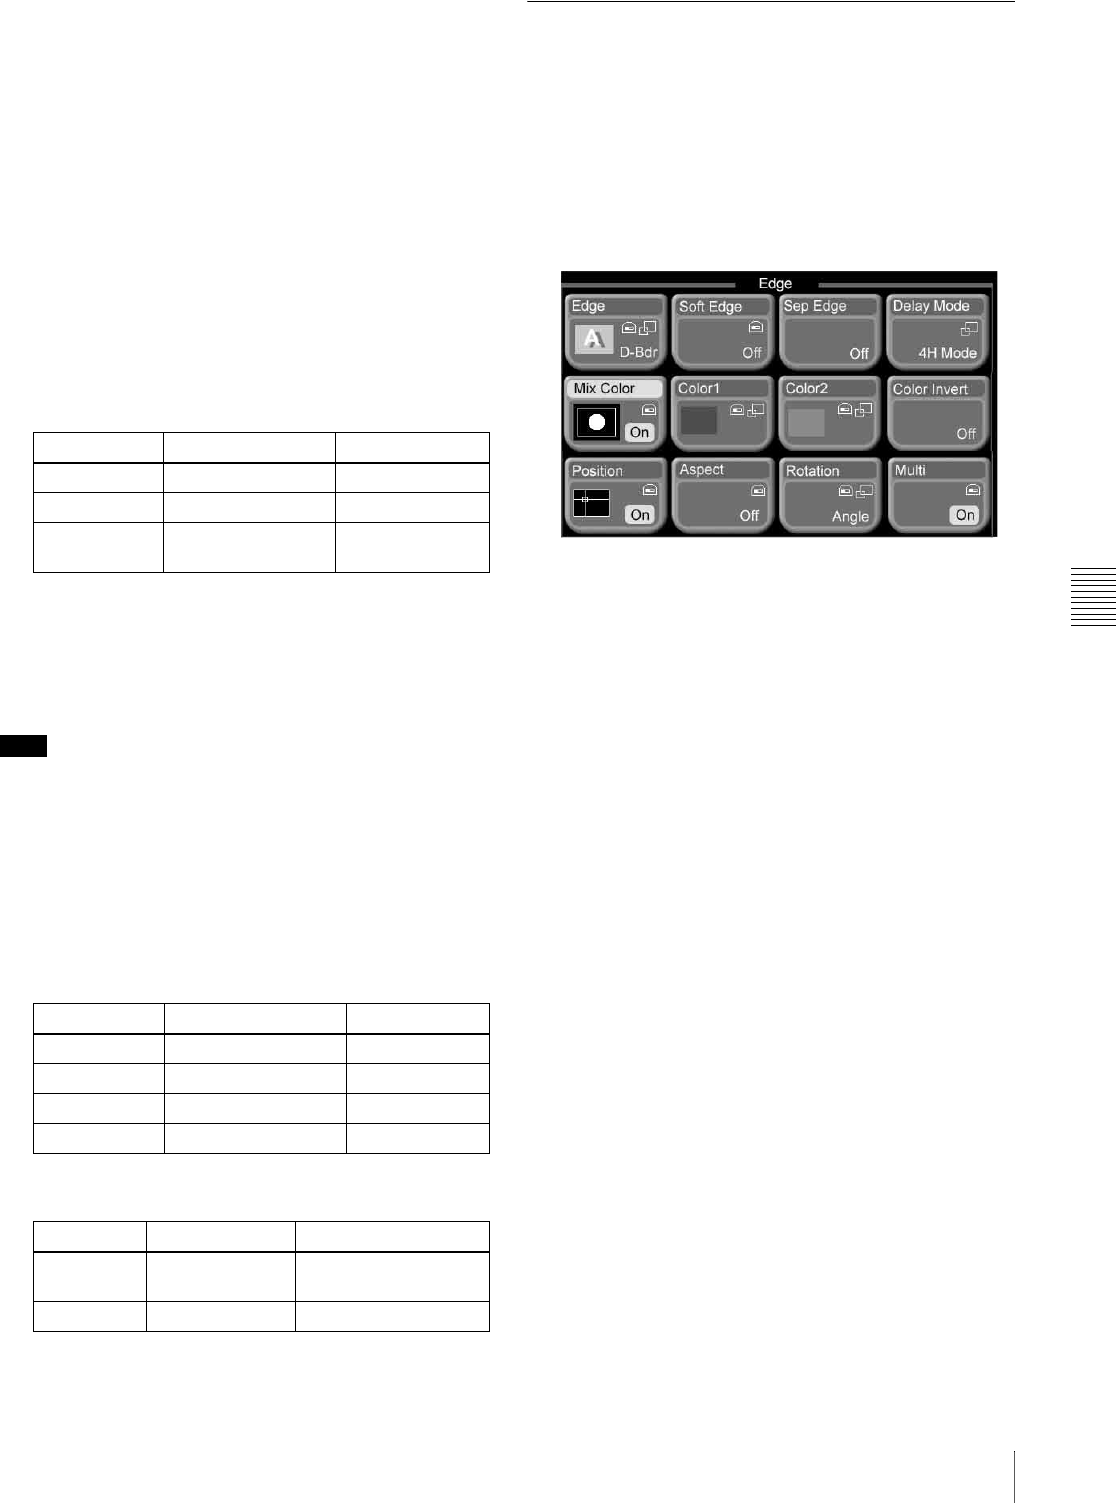
From the top menu, select Key >M/E Key1 >Edge.
The Edge menu appears.
2
Press [Mix Color], turning it on.
3
Set the pattern used to mix the 2 colors, and specify
color 1 and color 2.
See “To compose a pattern of two colors (color mix)”
(page 89) and “To transform color mix patterns”
(page 90) for information on how to set the
parameters. Note that the parameters H Modulation
and V Modulation are not available for color mix
patterns.
To set separate border widths (Separate
Edge function)
When you add borders or outlines to luminance keys,
linear keys, or chroma keys, you can set the widths of the
four borders separately.
In the Key >M/E Key1 >Edge menu, press [Sep Edge],
turning it on.
The width of the four borders are now separately
adjustable.
Setting maximum border widths
When you add borders, drop borders, drop shadows, or
outlines to key edges, proceed as follows to set the
maximum width.
1
In the Key >M/E Key1 >Edge menu, press [Delay
Mode], turning it on.
A popup window appears.
2
Press one of the following.
Knob Description Setting values
1 (Left Pos) Left edge position –4.00 to +4.00
2 (Right Pos) Right edge position –4.00 to +4.00
3 (H Phase) Horizontal direction
position
Left Pos value
shown
Parameter group [1/2]
Knob Description Setting values
1 (Left Pos) Left edge position –2.00 to +2.00
2 (Right Pos) Right edge position –2.00 to +2.00
3 (Top Pos) Top edge position –2.00 to +2.00
4 (Bottom Pos) Bottom edge position –2.00 to +2.00
Parameter group [2/2]
Knob Description Setting values
1 (H Phase) Horizontal
position
Left Pos value shown
2 (V Phase) Vertical position Top Pos value shown
