Chapter 9 System Settings
163Installing Software
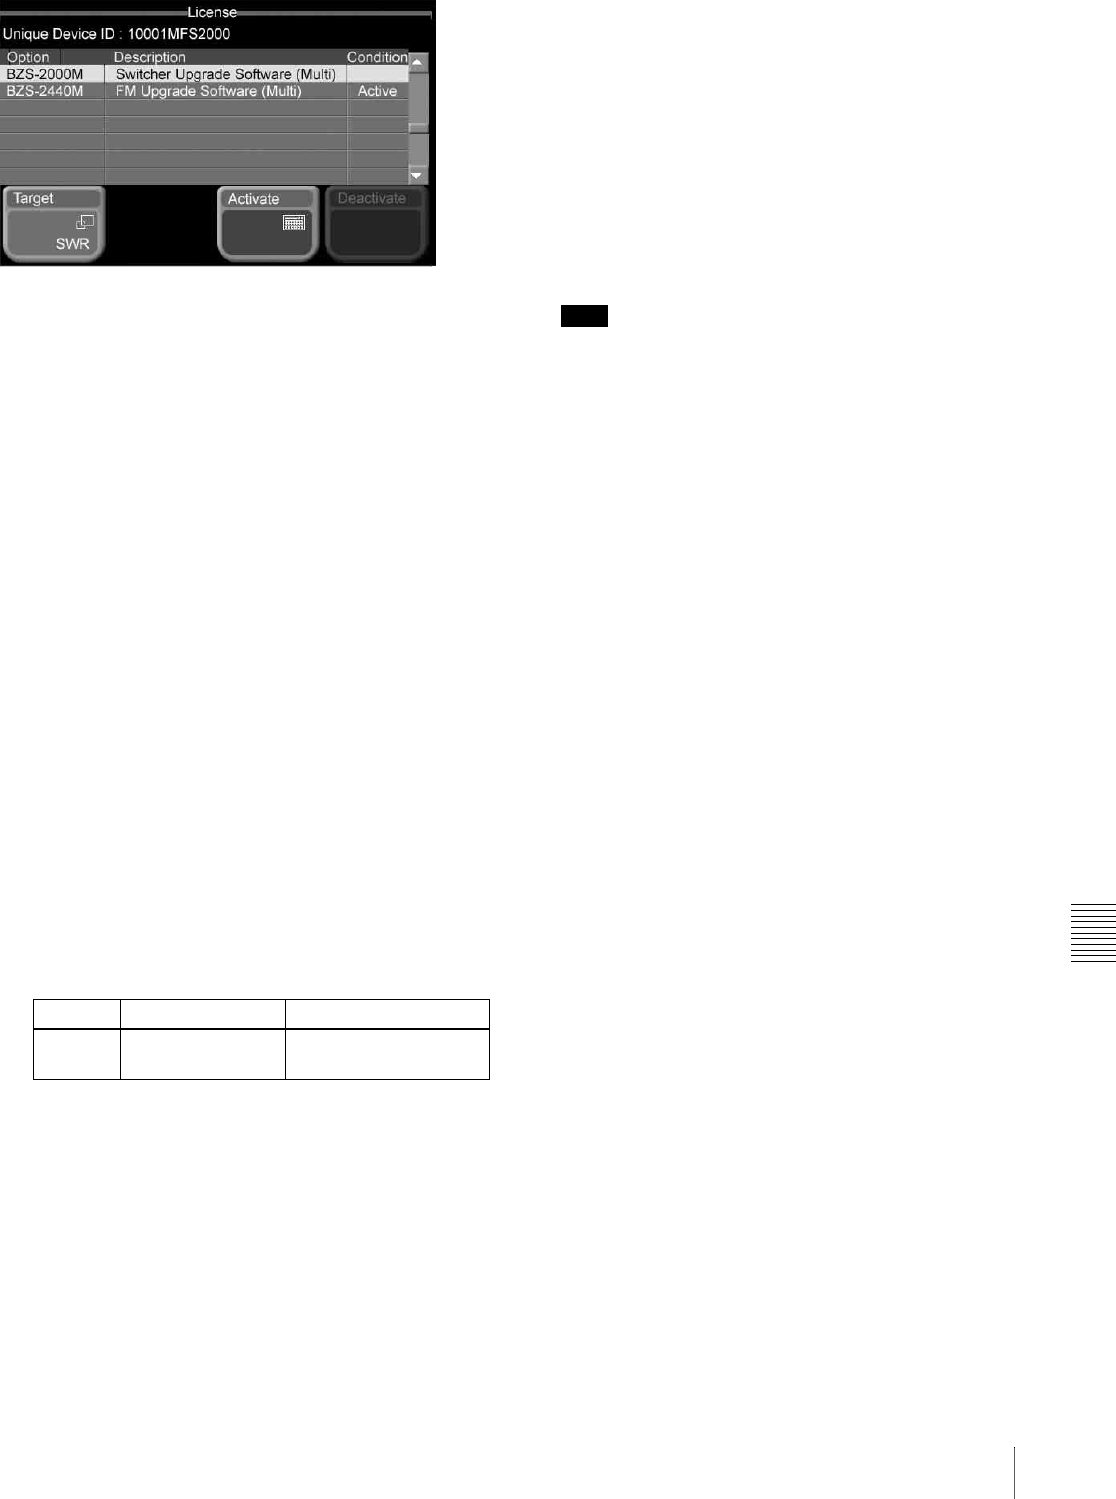
The abbreviation for the currently selected application
appears on the [Target] button. The status area shows the
device ID (Unique Device ID) for the currently selected
application, and the model number, product name, and
current state ([Active] or blank) of each of the options
available. Unsupported option columns are grayed out.
To change the application for which device ID
and option information is displayed
Press [Target].
When the popup window appears, press the button for the
application for which you want to view the information.
The button names are the same as the application
abbreviations (see “Abbreviations for applications” (page
161)).
Entering an installation key to activate an
option
1
Referring to the previous item “Checking the device
ID,” display the License menu for the application for
which you want to activate an option.
2
Select the option you want to use.
• Press directry on the list in the status area.
• Use the arrow buttons to scroll the reverse video
cursor.
• Turn the knob.
a) The maximum value depends on application.
3
Press [Activate].
A keyboard window appears.
4
Enter the installation key.
If the installation key is correct: a message appears,
indicating that the option will be activated by
carrying out a restart. Press [OK] in the dialog box,
and proceed to step 5.
If the installation key is incorrect: a message
appears, indicating that the installation key is
incorrect. Press [OK] in the dialog box, go back to
step 3, and re-enter the installation key.
5
Using either of the following methods, restart the
system.
• In the Setup/Diag >System >Initialize menu, press
[Reset].
• Exit the menu system, power the control panel off
and then power it on again.
Note
Be sure to exit the menu system before powering the
control panel off. (On how to exit the menu system, see
“Exiting the Menu System” (page 42).)
After the restart, when you display the License menu,
for the activated option, the [Condition] column shows
[Active].
To deactivate an option
1
Referring to steps 1 and 2 of “Entering an installation
key to activate an option,” select the option you want
to deactivate.
2
Press [Deactivate].
A confirmation message appears, prompting whether
to deactivate the option.
3
Press [Yes] in the dialog box.
A message appears, indicating that after a restart the
option will be deactivated.
To cancel deactivating the option
Press [No] in the dialog box.
4
Press [OK] in the dialog box, restart the system.
After the restart, when you display the License menu,
for the deactivated option, the [Condition] column is
blank.
Knob Description Setting values
1 (No) Selection of option
you want to use
1 and upwards
a)


