


To remove a SIMM, carefully spread the retaining clips at both ends of the
installed SIMM, then rotate the SIMM forward until it can be pulled free of
the slot.
2 Repeat step 1 to install the second SIMM if necessary.
You’ve now installed the expanded memory. You need only replace the side
cover to complete the installation.
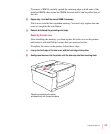
3 Remove and discard the grounding wrist strap.
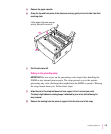
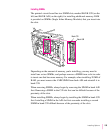
Replacing the side cover
After installing the memory, you then replace the side cover on the printer
and fasten it with the Phillips screws that you removed earlier.
To replace the cover on the printer, follow these steps.
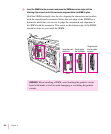
1 Line up the front edge of the side cover with the front edge of the printer.
2 Gently press the cover into the printer until the tabs snap into their receiving slots.
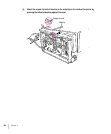
Place the cover back on the printer
and press firmly until it snaps into place.
157
Installing Options