You can drag this icon to any position you want on your desktop or place it
into a folder.
The last desktop printer created becomes the default printer. Your documents
will automatically be printed on the default printer. For more information
about selecting between available printers, see “Switching Between Printers,”
later in this chapter.
If this is your only desktop printer, you can’t get rid of the icon by dragging it
to the Trash. (The icon will reappear if you do.) To get rid of the LaserWriter
12/640 PS desktop printer, you must first select a different desktop printer as
the default printer and then drag the LaserWriter 12/640 PS printer icon to the
Trash. If you don’t want to use desktop printer icons, see “Turning off or
Removing the Desktop Printing Software,” later in this chapter, for more
information.
Making changes to the printer setup
If you change options on your printer, you must set up the printer again.
1 Select the desktop printer icon for the printer you want to set up.
2 Choose Change Setup from the Printing menu.
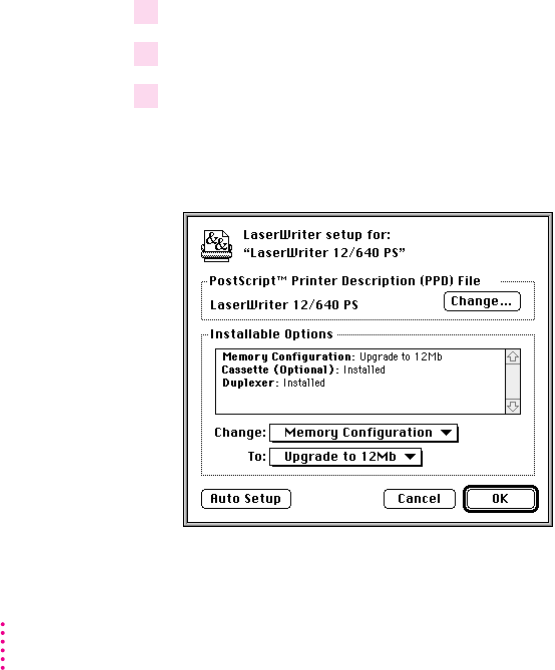
3 Click Auto Setup.
Printer options are displayed in the Setup dialog box. (Your screen may not
look exactly like the illustration.)
172
Chapter 6
