


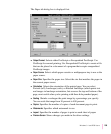

Custom Installation lets you specify what portions of the software you would
like to install.
Printer Driver Only installs only the PostScript printer driver and printer
description files.
De-Install lets you remove previously installed LaserWriter software.
9 Click Express Installation.
A window appears that keeps you informed as file decompression proceeds.
Next, the Installer asks you to press a button to restart Windows.
10 Click Restart Windows.
After Windows restarts, the Adobe PostScript Printers control panel appears.
11 Remove
LaserWriter Disk 1 for Windows 3.1
and insert
LaserWriter Disk 2 for Windows 3.1.
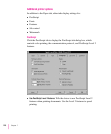
12 Select a: or b: (depending on which drive holds your installation disk) from the Drives
list box.
13 Select the LaserWriter 12/640 PS and click Install.
The PostScript printer driver files and other software are installed on the hard
disk. A message appears telling you that the driver software was successfully
installed.
14 Click OK to dismiss the message.
15 Select another Apple LaserWriter printer, if you want, and click Install to install. Repeat
for each printer you want to install.
You can install other Apple LaserWriter printers supported by the software.
16 When you’re done, click Close.
A message appears telling you to use the Printers control panel to connect
and set up the printers you’ve installed. By default, each printer uses LPT1.
The Printers control panel Setup dialog box lets you specify a different port,
for example, LPT2, or a NetWare queue.
17 Click OK to dismiss the message.
Installation is complete.
203
Windows 3.1 and DOS Users