


CDM-Qx Satellite Modem Revision 5
Installation MN/CDMQx.IOM
2–2
2.2 Mounting
If the modem is to be mounted in a rack, ensure that there is adequate clearance for
ventilation, particularly at the sides. In rack systems where there is high heat dissipation,
forced air-cooling must be provided by top or bottom mounted fans or blowers. Under no
circumstance should the highest internal rack temperature be allowed to exceed 50°C
(122°F).
2.2.1 Optional Rear-Mounting Installation Bracket
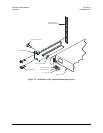
Install optional installation brackets (Figure 2-1) using mounting kit KT/6228-2:
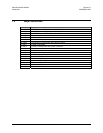
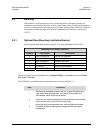
Mounting Kit KT/6228-2 (Optional)
Quantity Part Number Description
2 HW/10-32SHLDR Screw, #10 Shoulder
4 HW/10-32FLT Washer, #10 Flat
2 HW/10-32SPLIT Washer, #10 Split
2 HW/10-32HEXNUT Nut, #10 Hex
2 FP/6138-1 Bracket, Rear Support
4 HW/10-32x1/2RK Bolt, #10 Rack Bracket
The tools required for this installation are a medium Phillips™ screwdriver and a 5/32-inch
SAE Allen™ Wrench.
The CDM-QD is assembled into the equipment rack as shown in Figure 2-1:
Step Procedure
1
Secure the #10 shoulder screws to the unit chassis through the rear
right and left side mounting slots, using the #10 flat washers, #10
split washers, and #10 hex nuts as shown.
2
Install the rear support brackets onto the equipment rack threaded
rear mounting rails, using the #10 bracket bolts.
3
Mount the unit into the equipment rack, ensuring that the shoulders
of the #10 shoulder screws properly engage into the rear support
bracket slots.