


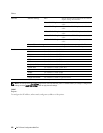

WSD Port Number Sets the port number to 80 or from 8,000 to 9,999.
Receive
Time-Out
Sets the receive time-out period from 1 to 65,535 seconds.
Notification Time-
Out
Sets the notification time-out period from 1 to 60 seconds.
Maximum Number
of TTL
Sets the maximum number of TTL from 1 to 10.
Maximum Number
of Notification
Sets the maximum number of notifications from 10 to 20.
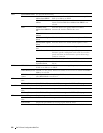
FTP Password Sets the password for FTP.
Re-enter Password Enter the password again to confirm it.
Connection Time-
Out
Sets the connection time-out period from 1 to 1000 seconds.
HTTP Port Number Sets the port number to 80 or from 8,000 to 9,999.
Simultaneous
Connections
Displays the maximum number of simultaneous connections.
Connection Time-
Out
Sets the connection time-out period from 1 to 255 seconds.
Telnet Password Sets the password for Telnet.
Re-enter Password Confirms the set password.
Connection Time-
Out
Sets the connection time-out period from 1 to 1,000 seconds.
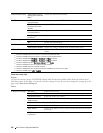
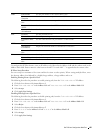
To configure the IP Filter feature, enter an IP address to be filtered in the Address field and the subnet mask in the
Address Mask field. Enter a numeric value between 0 and 255 in each field. "*" is appended to the current value.
IP Filter Setup Procedure
You can set up to a maximum of five items and the first item set takes priority. When setting multiple filters, enter
the shortest address first followed by a slightly longer address, a longer address and so on.
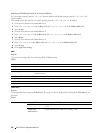
Enabling Printing From a Specified User
The following describes the procedure to enable printing only from the "192.168.100.10" IP address.
1
Click the first column of the
Access List
row
1
.
2
Enter "
192.168.100.10
" in the
Address
field and "
255.255.255.255
" in the
Address Mask
field.
3
Select
Accept
.
4
Click
Apply New Settings
.
Disabling Printing From a Specified User
The following describes the procedure to disable printing only from the "192.168.100.10" IP address.
1
Click the first column of the
Access List
row
1
.
2
Enter "
192.168.100.10
" in the
Address
field and "
255.255.255.255
" in the
Address Mask
field.
3
Select
Reject
.
4
Click the first column of the
Access List
row
2
.
5
Enter "
0.0.0.0
" in the
Address
field and "
0.0.0.0
" in the
Address Mask
field.
6
Select
Accept
.
7
Click
Apply New Settings
.
Dell™ Printer Configuration Web Tool 155