5
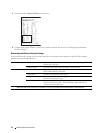
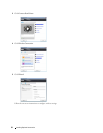
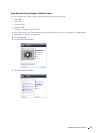
Select
Advanced
, and then select a connection method from
WPS-PBC
,
WPS-PIN
,
Operator Panel
,
Ethernet
Cable
, or
Dell Printer Configuration Web Tool
.
For
Ethernet Cable
:
a
Select
Ethernet Cable
, and then click
Next
.
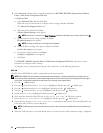
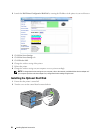
Follow the on-screen instructions to configure wireless settings, and then click
Next
.
The
Advanced Configuration Tool
starts.
b
Select the printer, and then click
Next
.
Wireless Network Settings
screen appears.
NOTE: If the printer is not listed, click Enter IP Address and enter the IP address of your printer, and then click OK.
c
Set the wireless network settings, and then click
Next
.
IP Address Settings
screen appears.
NOTE: For details on each item, see "Assigning an IP Address."
d
Set the IP address settings of the printer, and then click
Next
.
Confirm the settings
screen appears.
e
Confirm the settings, and then click
Apply
.
Complete configuration
screen appears.
f
Click
Next
.
For
WPS-PBC
,
WPS-PIN
,
Operator Panel
, and
Dell Printer Configuration Web Tool
, follow the on-screen
instructions to configure wireless settings.
To configure wireless settings without using the video instructions, see the following instructions.
WPS-PIN
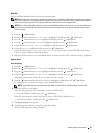
The PIN code of WPS-PIN can only be configured from the operator panel.
NOTE: WPS-PIN (Wi-Fi Protected Setup-Personal Identification Number) is a method to authenticate and register devices
required for wireless configuration by entering PIN assignments to a printer and computer. This setting, performed through an
access point, is available only when the access points of your wireless router supports WPS.
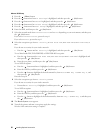
1
Press the
(Menu)
button.
2
Press the button until
Admin Settings
is highlighted, and then press the
(Set)
button.
3
Press the button until
Network
is highlighted, and then press the
(Set)
button.
4
Press the button until
WPS Setup
is highlighted, and then press the
(Set)
button.
5
Ensure that
PIN Code
is highlighted, and then press the
(Set)
button.
6
Write down the displayed 8-digit PIN code or select
Print PIN Code
. The PIN code is printed.
7
Ensure that
Start Configuration
is highlighted, and then press the
(Set)
button.
8
Ensure that the message
Please wait WPS Setting
is displayed, and enter the PIN code displayed on step
6 into the wireless LAN access point (Registrar).
NOTE: For WPS operation on the wireless LAN access point, refer to the manual supplied with the wireless LAN access
point.
9
When the WPS operation is successful and the printer is rebooted, wireless LAN connection setting is completed.
Installing Optional Accessories 54


